A Step-by-Step to Fix the GLFW Error 65542 in Minecraft
Understanding the Error
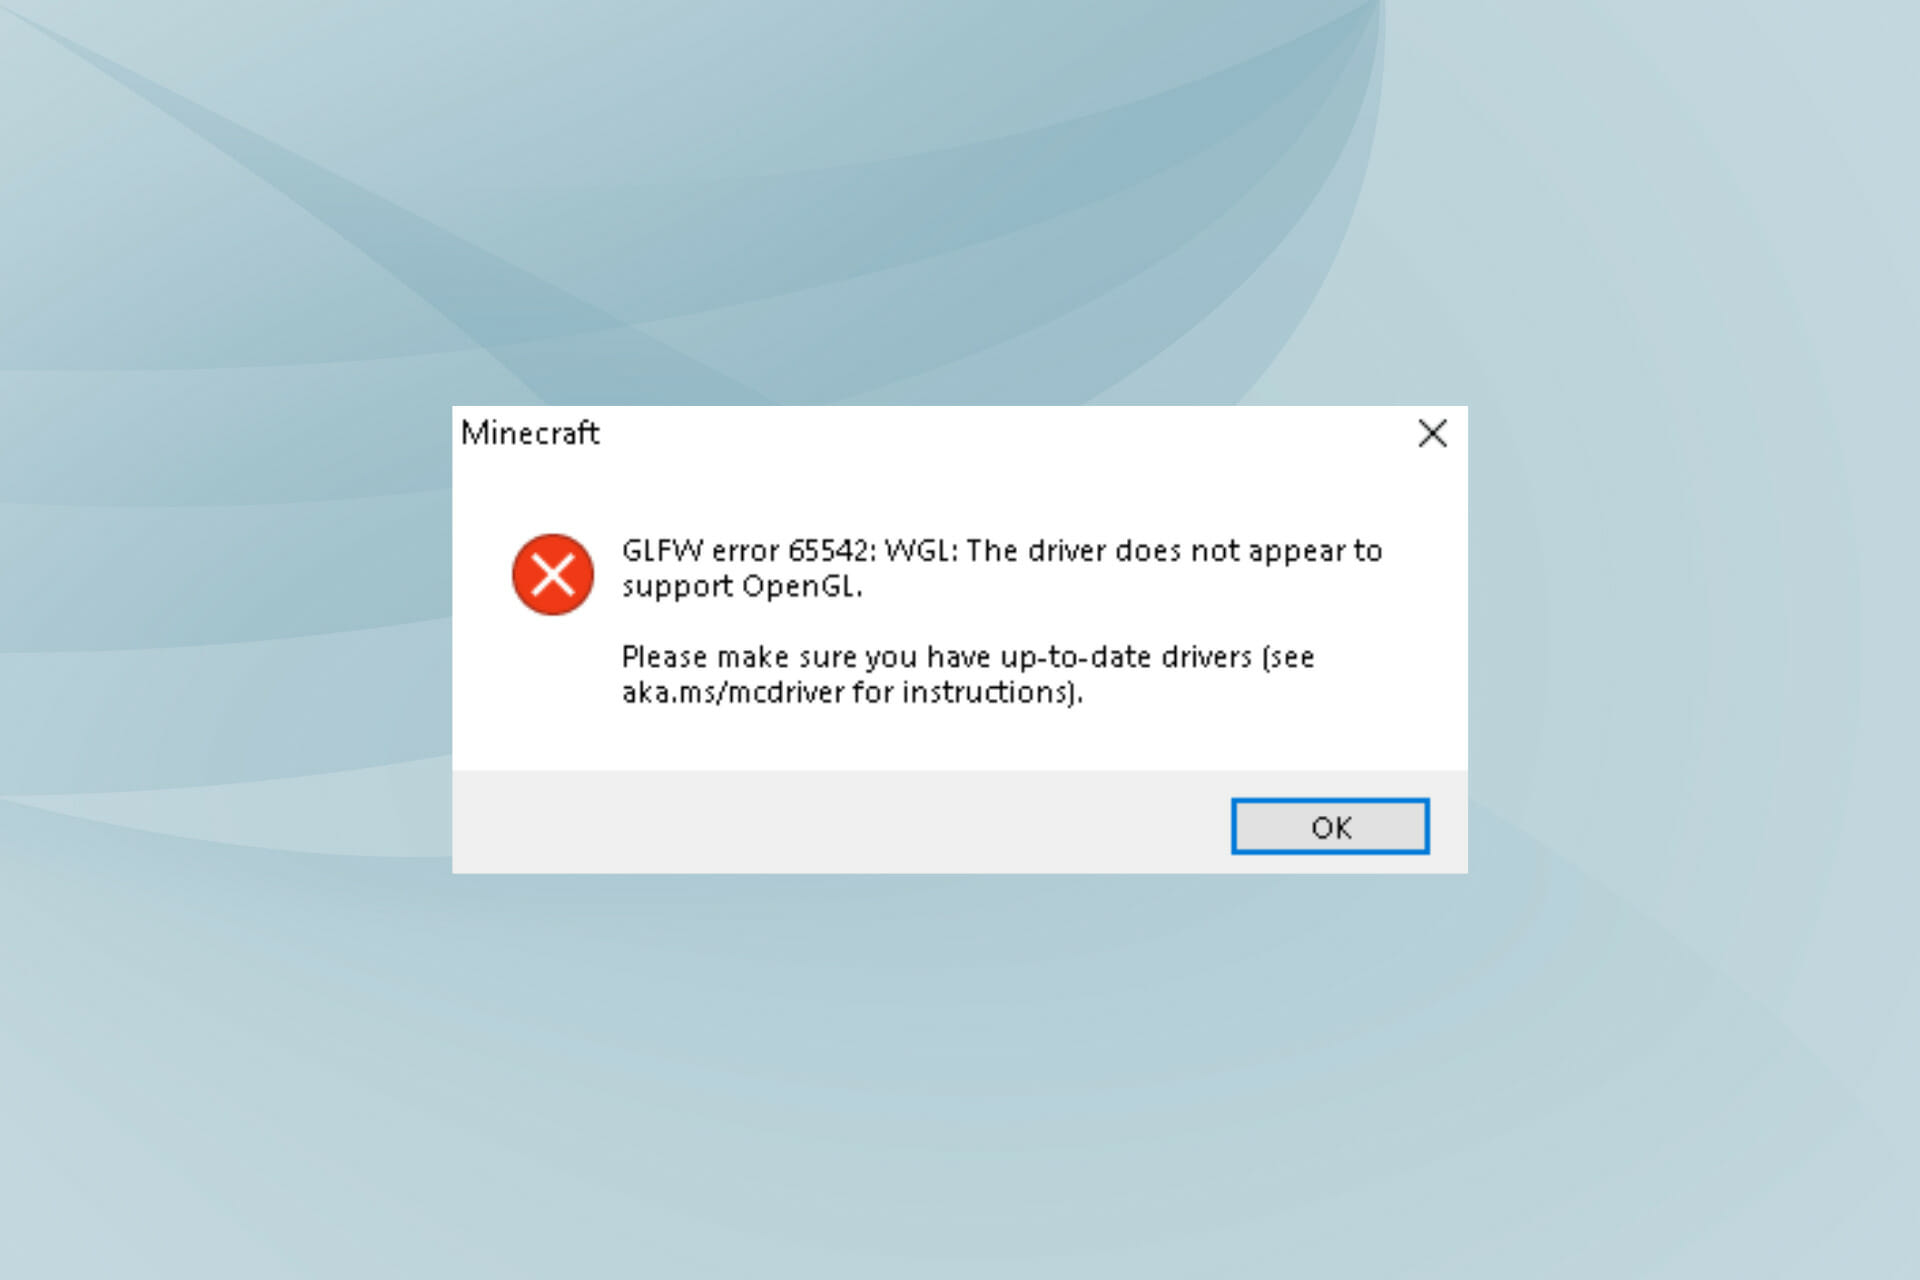
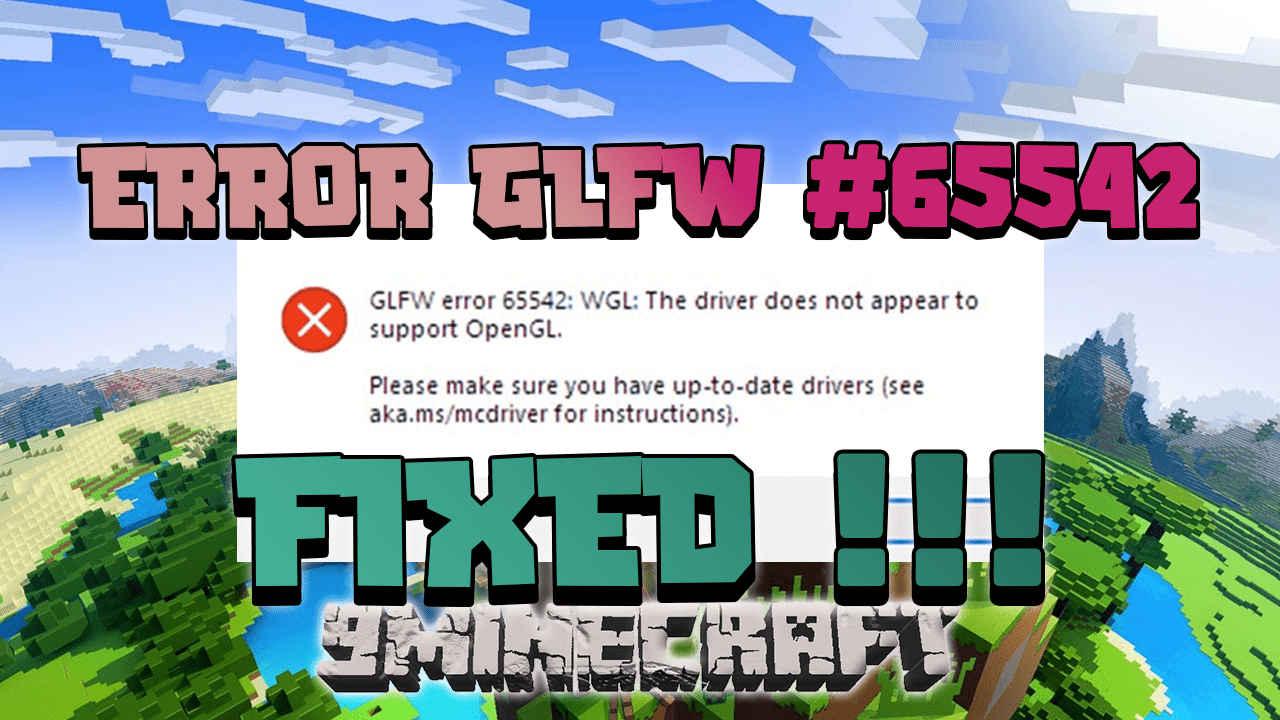
The GLFW error 65542 arises when the OpenGL library is missing or there’s a problem with the graphics driver. The installed driver could be outdated, or corrupt, or there might be a bug in the installed version. Incompatibility or issues with the game itself could also lead to this error.
Step 1: Update Your Graphics Driver
The first step in resolving the GLFW Error 65542 is to update your graphics driver. An outdated or corrupt driver can cause this error. You can manually update your driver or use a tool like Driver Easy to automatically update it. After updating the driver, restart your computer and try launching the game again. Or you can manually update:
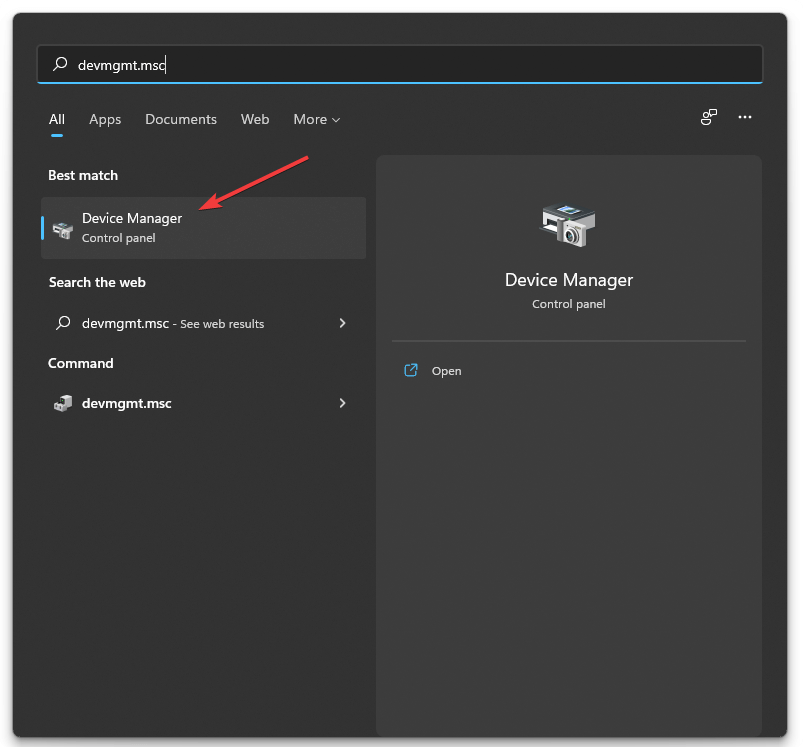
- Press Windows + S to launch the Search menu, enter Device Manager in the text field at the top, and click on the relevant search result.
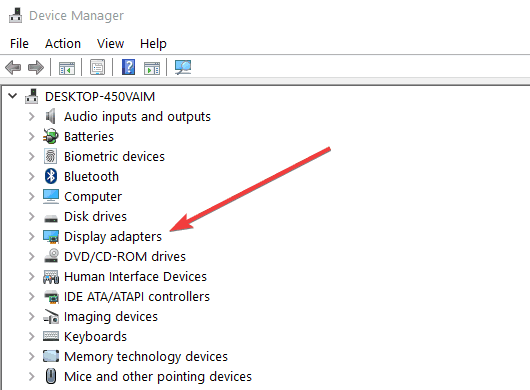
- Double-click on the Display adapters entry here.
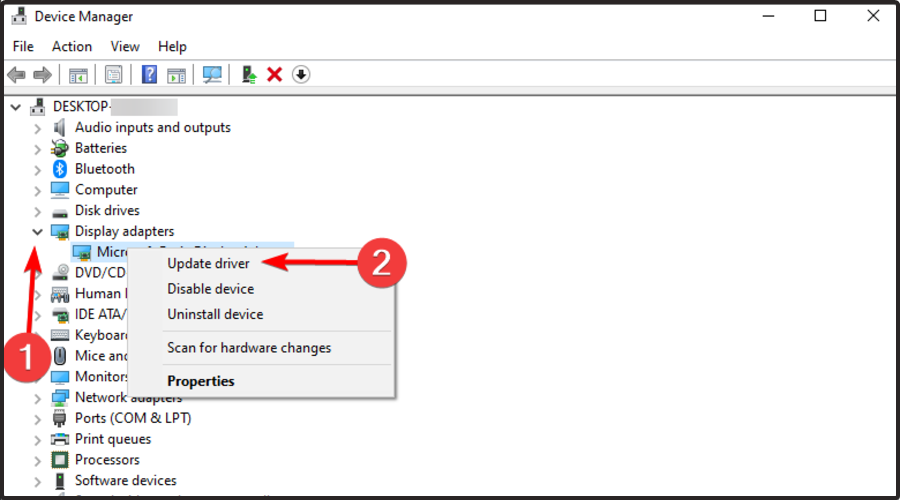
- Now, right-click on the installed graphics card, and select Update driver from the context menu.
Step 2: Manually Add the OpenGL.DLL
If the error is triggered by a missing opengl32.dll file, you can manually add the OpenGL.DLL to the Java and JRE folder. Navigate here to download the latest version of the opengl.dll file. Extract the downloaded zip file to a folder, copy the opengl32 file, and paste it into the Java and JRE environment. Once done, restart your computer and check if the error is resolved.
Step 3: Uninstall Conflicting Drivers
Some drivers, like the DisplayLink Graphics driver, can conflict with Minecraft Java and cause the GLFW Error 65542. If you have this driver installed, try uninstalling it. After uninstalling, restart your computer and try launching the game again.
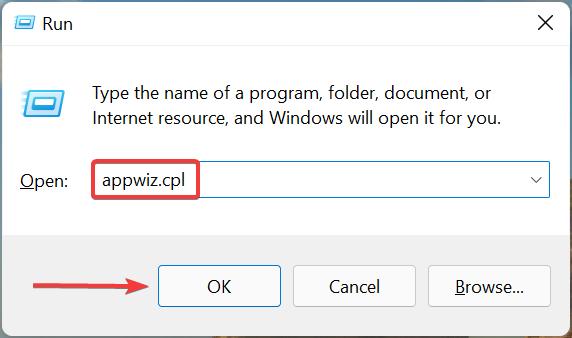
- Press Windows + R to launch the Run command, enter appwiz.cpl in the text field, and either click OK or hit Enter to launch Programs and Features.
- Now, locate any entry here by the name DisplayLink, select it, and click on Uninstall.
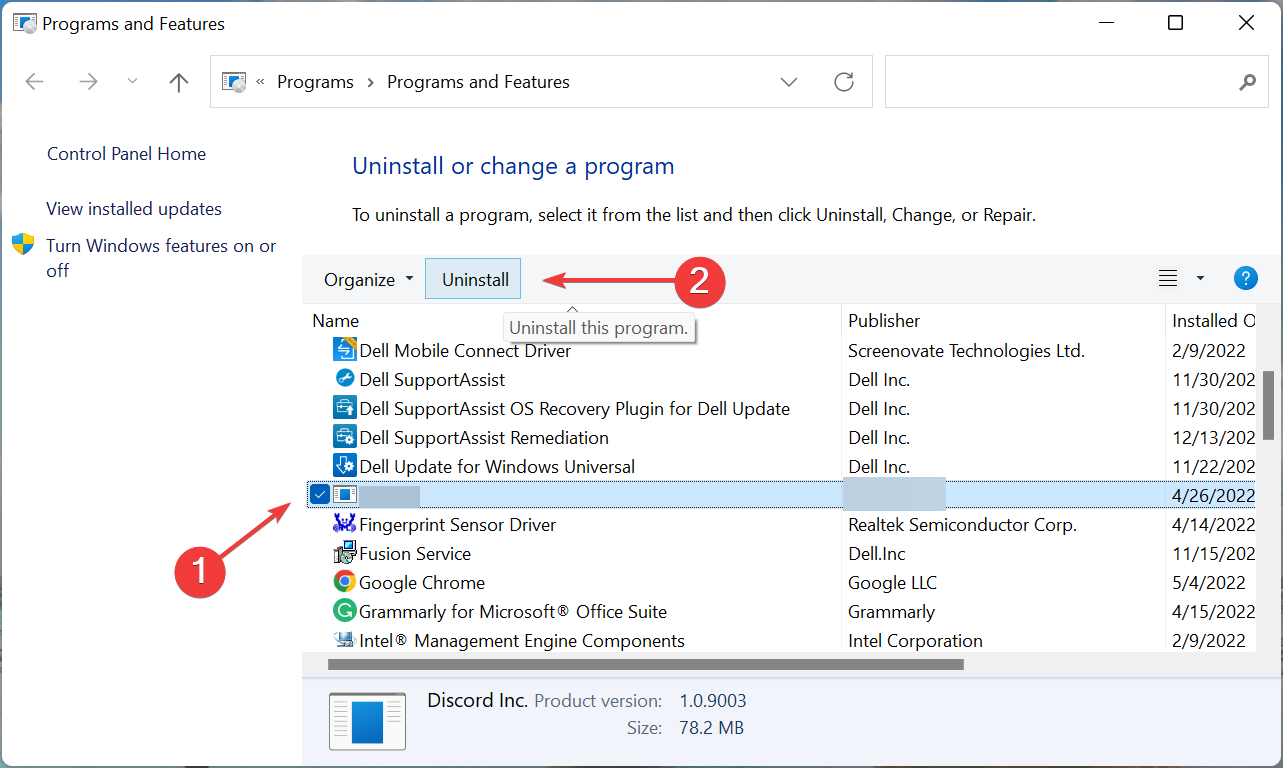
- Follow the on-screen instructions to complete the process.
Step 4: Install the Latest Windows Updates
Sometimes, the error can be an unresolved bug of a previous Windows version that may have been solved through a new update. Check for Windows updates and install any available ones. After updating, restart your computer and check if the error is resolved.
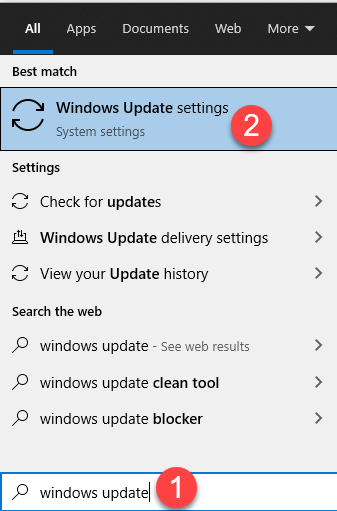
- On your keyboard, press the Windows logo key and type Windows update, then click on Windows Update settings as it pops up as a matching result.
- Click Check for updates. It will automatically start to scan available updates for your computer.
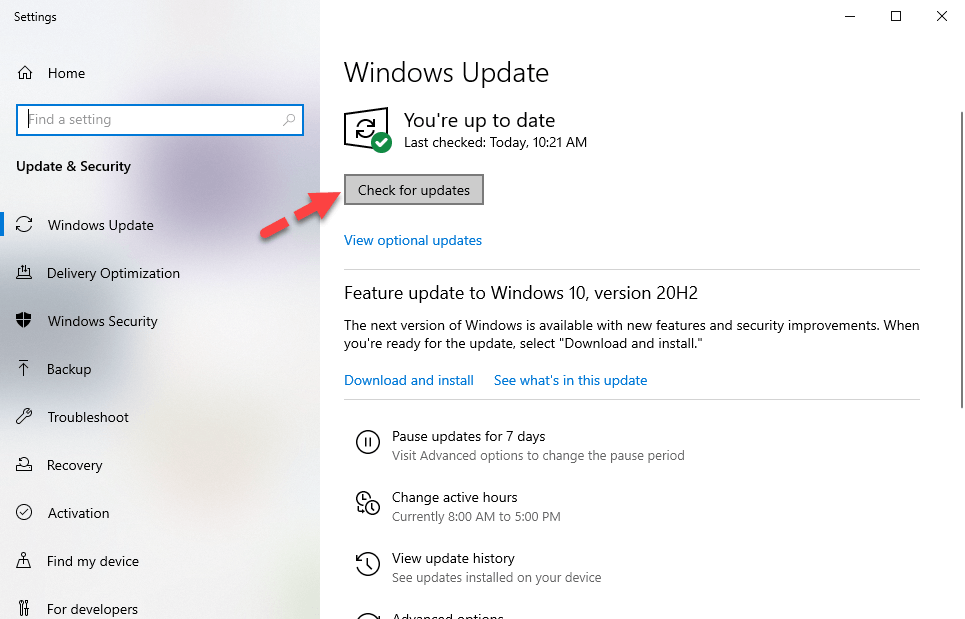
- Wait a while for Windows to check and automatically install the updates for you.
- Restart your computer.
- Check to see if the error is fixed.
Step 5: Repair Corrupted System Files
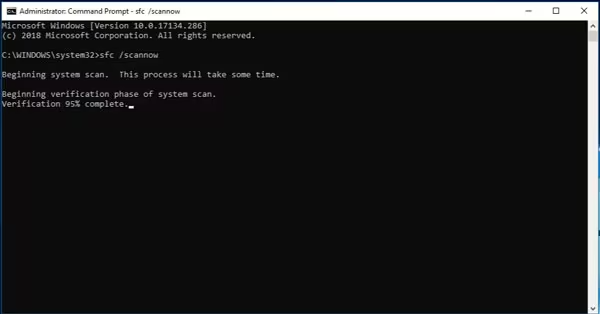
If the error persists, it’s possible that corrupted system files are to blame. You can use the System File Checker (SFC) tool to scan and repair missing or corrupted system files. If the SFC tool doesn’t resolve the issue, consider using a more powerful and specialized Windows repair tool like Restoro.
- Firstly, press the Windows key + X simultaneously to open the start menu.
- Next, click on the option’ command prompt (Admin)’ to open it. Another option you might find here is Windows PowerShell (Admin).
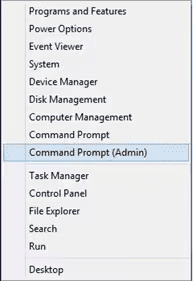
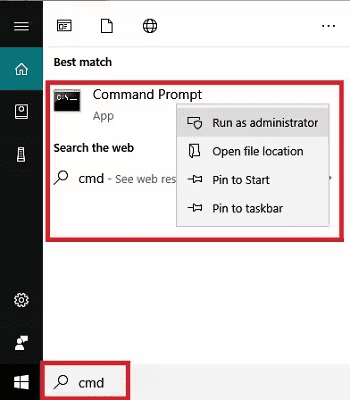
- Another way you could get to the command prompt is by simply typing cmd in the Windows Search Box, and you can run the command prompt as administrator.
- Click yes if it requires your permission to run the tool.
- The command will check for the damaged version of the system files. This process might take a while; ensure you don’t interrupt it while it scans.

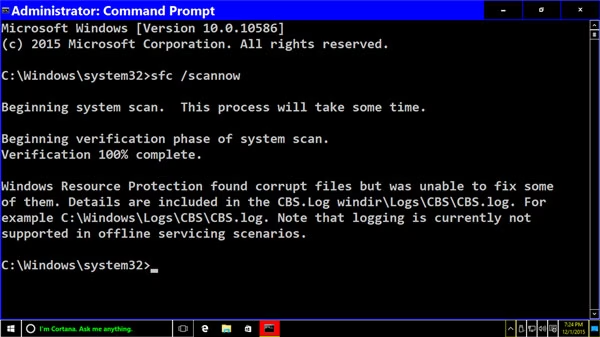
- Once the System File checker is done scanning, a message will pop up. The message determines the problem with the system files. Some of the common messages that could pop up include:
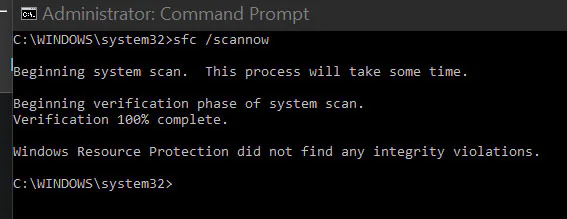
- Windows Resource Protection didn’t find any integrity violations: This message usually means that there are no corrupt system files and none are missing either.
-
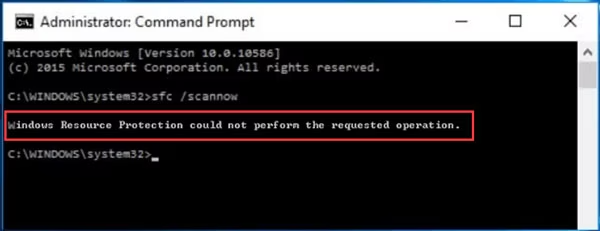
- Windows Resource Protection couldn’t perform the requested operation: This shows issues with your system files. You might need to run SFC in safe mode on such occasions to fix this.
-
-
Windows Resource Protection found corrupt files and fixed them: This message indicates that SFC found the corrupt or modified files and has been able to fix the files. It also allows you to view details of the SFC process.

-
-
-
Windows Resource Protection found corrupt files but could not fix some of them: This system message indicates that while some of them are back to their original state, you will need to repair the rest files manually. This message also allows you to view the System File Checker process for the repaired files.
-

By following these steps, you should be able to resolve the GLFW error 65542 in Minecraft. Remember, each step is crucial and skipping one might not resolve the issue. Happy gaming!

