Homepage » Minecraft Mods » Correlated Potentialistics Mod 1.10.2
Correlated Potentialistics Mod 1.10.2
 64
64
 0
0
 May 6, 2017
Correlated Potentialistics Mod 1.10.2 adds a storage system based around digitizing items, allowing you to store tons of items in a small space that are conveniently accessible, through a single scrollable/searchable GUI. Correlated Potentialistics is a minimalistic Applied Energistics like mod for Minecraft.

This mod does not include a way to generate RF. You will need another mod like Progressive Automation or BuildCraft to generate RF.
Features:
Blocks
Controller
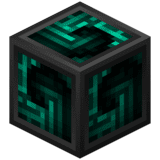
The Controller manages a network and all it’s members, and is responsible for keeping track of all present drive bays and their contained drives, as well as delegating requests to add and remove items to the correct drives. As such, it is required that a network have a controller. Unlike AE2, this mod does not have ad-hoc networks.
Power Usage
On it’s own, a Controller uses 32 RF/t. Each member of a network also consumes RF, but does this by simply increasing the consumption rate for the controller itself.
Item Distribution
A Controller decides which drive to send items to based on both it’s distance from the controller and the drive’s priority. At the drive bay level, the top-left drive is checked first, then the rest are checked left-to-right top-to-bottom, like shown:
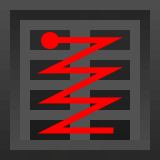
Drive bays closest to the controller are checked first, as a consequence of how the controller scans the network. Higher priority drives are checked before lower priority ones.
In addition, the export slots of interfaces will be scanned for items to be taken out. Items will never be added to an interface, unless the interfaces is configured to pull items.
Network Scanning
Controllers scan in an expanding diamond around them, stopping when they hit a block that is not a member of the network. An illustrated example:
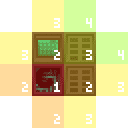
- The controller itself.
- Every block touching a face of the controller.
- Every block touching the face of a network member found in step 2.
- Every block touching the face of a network member found in step 3.
Here’s an illustration, showing the basic shape of the scanning:
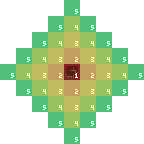
That is to say, the controller scan order ends up assigning the manhattan distance from the controller to the network member as it’s index for prioritization.
A controller will stop and error out if it ever tries to scan more than 100 blocks. This is to prevent extremely large networks from crashing and/or lagging the server. Note that our examples here are 2D, while the Minecraft world is 3D. This means that rather than 3 worst-case extra scans on ending blocks, you have 5 worst-case extra scans. These extra scans are counted in the 100 limit. You can have a network with way less than 100 members still error for being too big due to this. As such, large flat planes are an inefficient way of building a network, and it’s better to do other things such as putting drive bays back-to-back.
Drive Bay
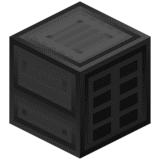
Note that the Drive Bay is simply a holder for drives. The Controller does all the heavy lifting, and if you want to read about priority and ordering logic, you will want to go to that page.
The Drive Bay is an essential part of any network, allowing you to expose the storage of Drives to the system. It will hold up to 8 drives, and consumes 8 RF/t on it’s own.
The Drive Bay also offers a convenient at-a-glance view of all the drives in your system and their current status. The colored light on the front of each drive will fade from green to red as the drive fills. (Void Drives will simply pulse between shades of purple.) In addition, if a drive is named on an anvil, you can look at it while it’s mounted in the drive bay to show its name.
The Drive Bay does not have a GUI, and as such, the way to insert drives is to hold the drive and right-click on an empty slot on the Drive Bay’s front face. You can do the same to a filled slot while holding anything to take the drive out.
Terminal
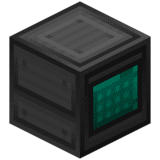
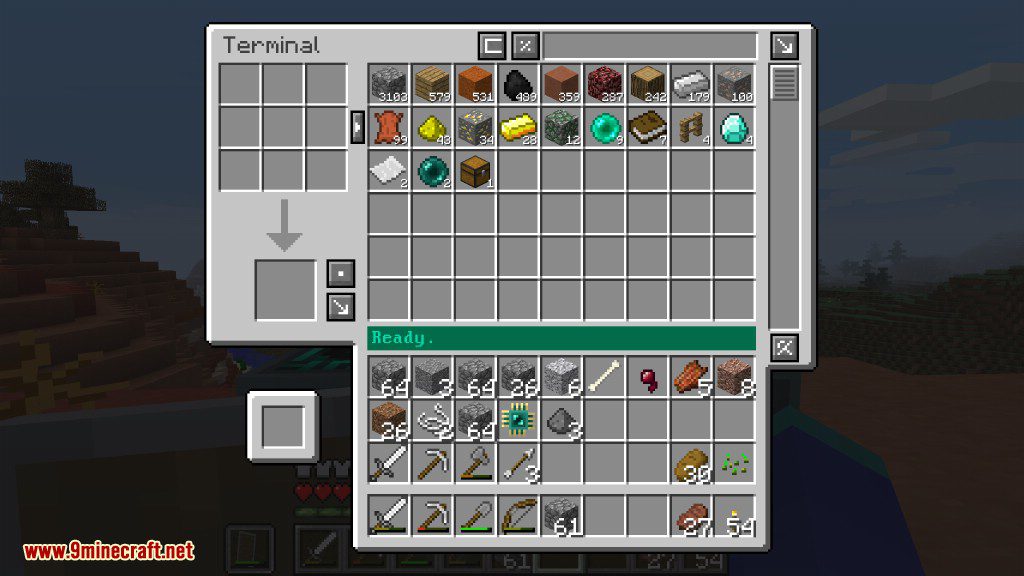
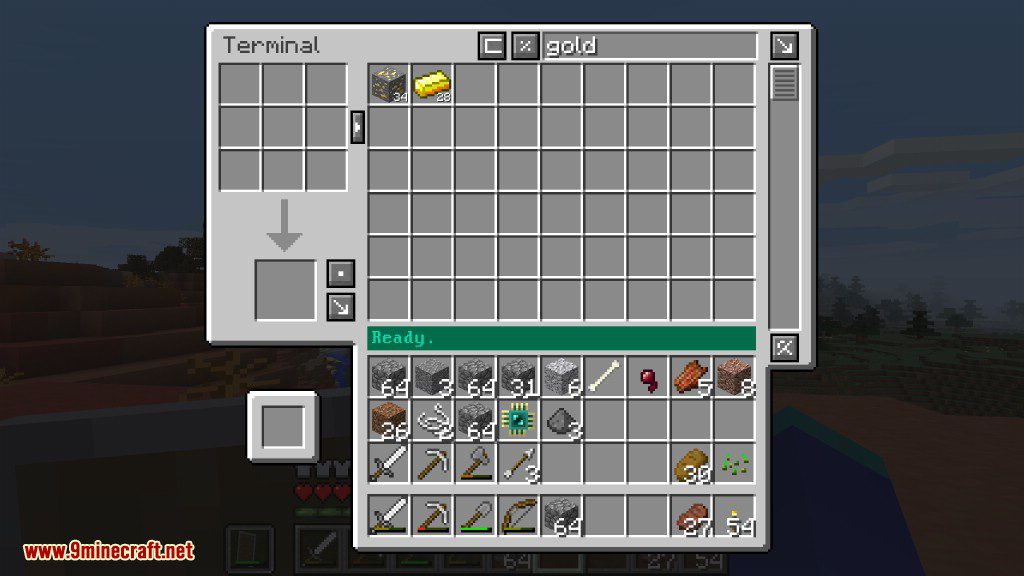
The Terminal allows you to directly access the storage of a system. When right-clicked, it will open a GUI showing every item in the system, sorted by quantity. The search bar in the top right will allow you to search for items containing a literal case-insensitive string.
Possible actions are:
- Left-click, remove 1 stack from the network
- Right-click, remove 1 item from the network
- Shift left-click, remove 1 stack from the network, directly into inventory
- Shift right-click, remove 1 item from the network, directly into inventory
- Drop key, remove 1 item from the network, onto the floor
- Ctrl+drop key, remove 1 stack from the network, onto the floor
The last one can be very useful for emptying out drives.
Sorting Modes
![]()
On either side of the search bar, there are buttons allowing you to set your sorting preference. This is unique per-terminal and per-user.
The left button allows you to set the sorting mode, while the right button sets direction. The possible sorting modes are:
- Quantity ( % ) – Items are sorted by the amount stored in the system, and items with the same quantity are sorted alphabetically by name.
- Originating Mod (Minecraft First) ( @ ) – Items are sorted alphabetically by which mod they are from, with items from vanilla showing up first. Items from the same mod are sorted alphabetically by name.
- Originating Mod ( @! ) – Identical to Originating Mod (Minecraft First), but without vanilla being treated specially.
- Name ( AZ ) – Items are sorted alphabetically by name.
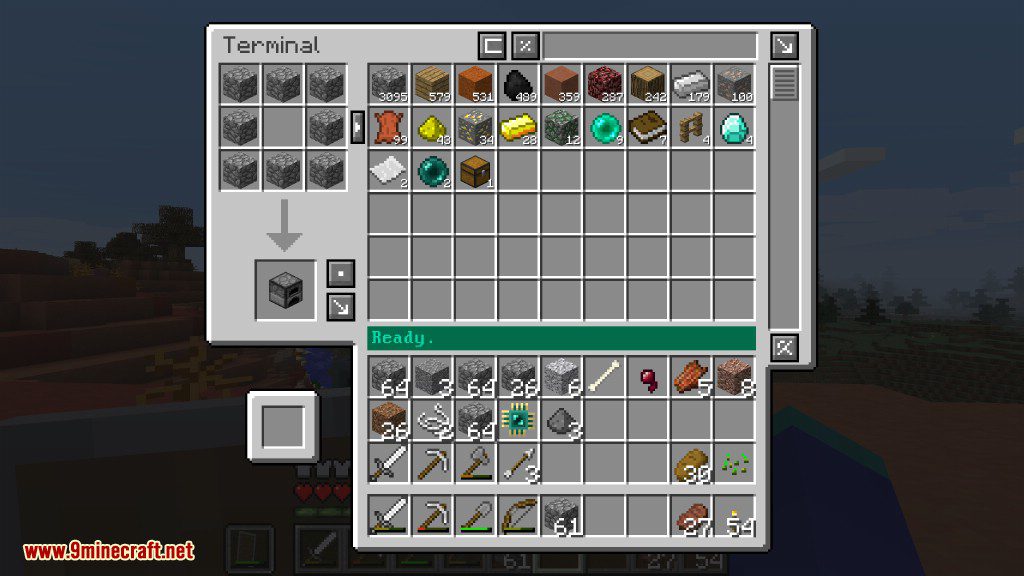
The Terminal also has the ability to craft potentially large amounts of items using ingredients from the system. An overview:
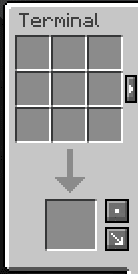
- The 3×3 at the top is the crafting grid, and accepts any recipes that can be used in a vanilla crafting table.
- The > (right arrow) button to the right of the crafting grid will put all the items in the grid back into the system when clicked.
- The button to the top-right of the result slot selects the amount to craft when shift-clicking, with three possible modes:
- One, represented with one dot. Crafts one item at a time. The default.
- Stack, represented with two dots. Crafts a full stack of the item at a time.
- Maximum, represented with four dots. Crafts as many of the item as possible, until you run out of ingredients, inventory space, or hit the 6400 limit, whichever comes first. To help cut down on mistakes, the mode is reset to One after a crafting operation on this mode.
- The button to the bottom-right of the result slot selects the target for shift-clicking. The arrow points toward where it will go, and you can choose between it going to your player’s inventory and it going directly into the storage system.
Dump Slot

In stand-alone terminals (not available in Wireless terminals), there is a slot in the bottom left that you can place Drives in. When a Drive is placed in this slot, the terminal will attempt to move the entire contents of the drive into the system. This is useful for decommissioning or re-purposing drives.
Interface
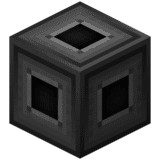
The Interface exposes the contents of the network to automation, or allows automation to add items to the network.
Using any BuildCraft-compatible wrench, you can reconfigure each face of the interface to choose the mode. There are four modes:
- Passive (white) – The contents of the interface are exposed, but the interface itself does not pull or push items. Items can be piped in or out of this side.
- Active – Push (orange) – The interface will attempt to push items into the adjacent inventory from it’s orange slots. Items cannot be piped into this side.
- Active – Pull (blue) – The interface will attempt to pull items from adjacent inventories into it’s blue slots, which will then be emptied into the network. Items cannot be piped out of this side.
- Disabled (no hole) – The interface will not accept pipe connections on this side and will not perform any action.
Currently, Push mode does not push into pipes. It will only push into inventories.
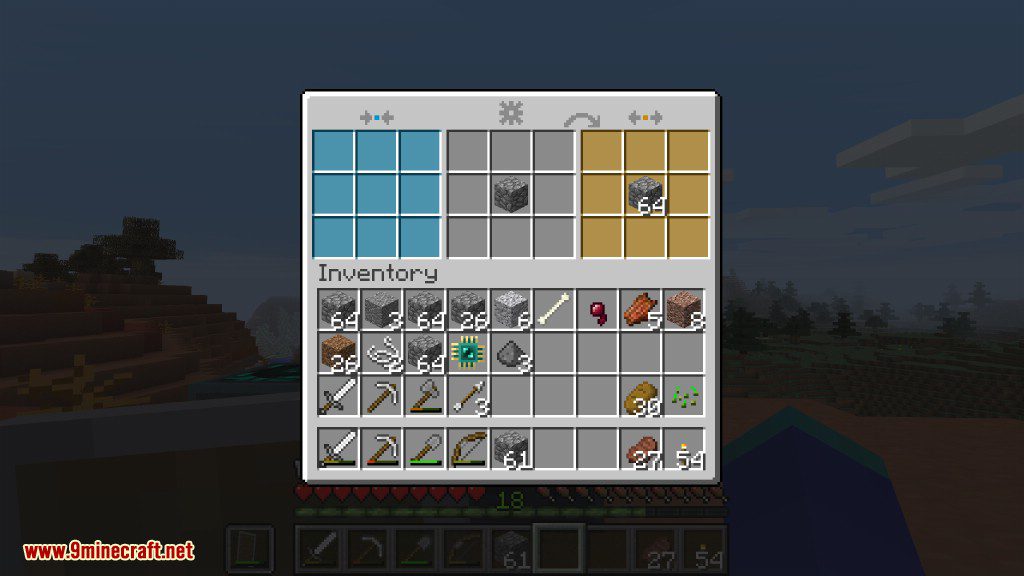
GUI
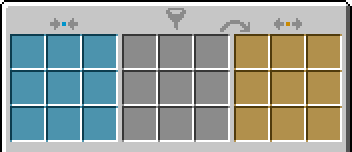
By right-clicking the interface while not holding a wrench, you will be presented with the above GUI.
- The blue slots are the input buffer. Every 16 ticks, the interface will attempt to insert these items into the storage network.
- The gray slots are the output filter. These determine what items will be put into what slots in the output buffer.
- The orange slots are the output buffer. Every 16 ticks, the interface will attempt to put as many items as possible into each of these slots, taken from the network (including other interfaces, if necessary), as configured in the filter.
The orange slots are also visible from within the storage network, so even if you have an interface with a bunch of items in it’s buffer, you can still grab them from a terminal.
Examples
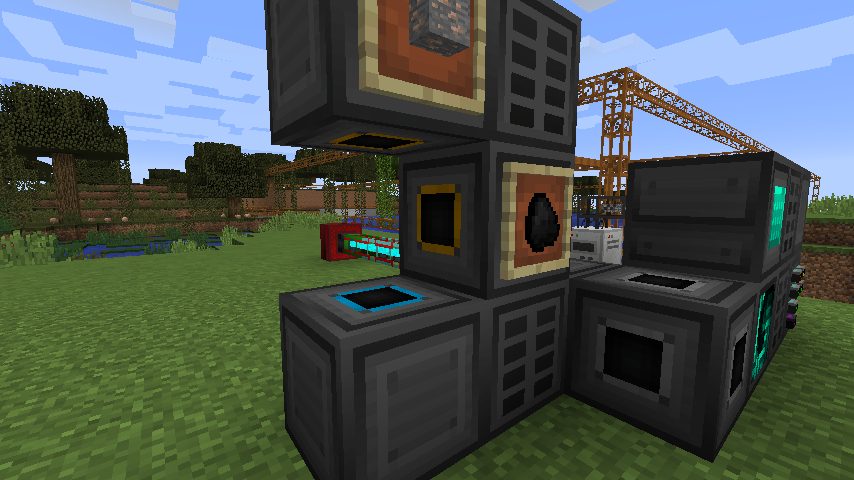
An autosmelter made using Interfaces (The furnace goes in between all the interfaces, it was removed in the screenshot so the faces were visible)
Wireless Receiver
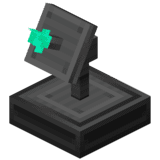
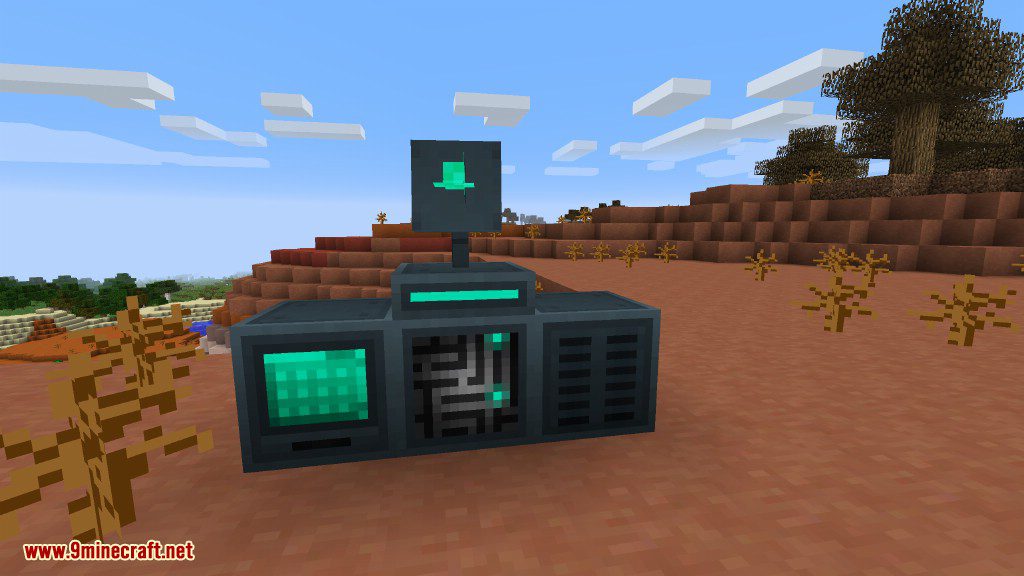
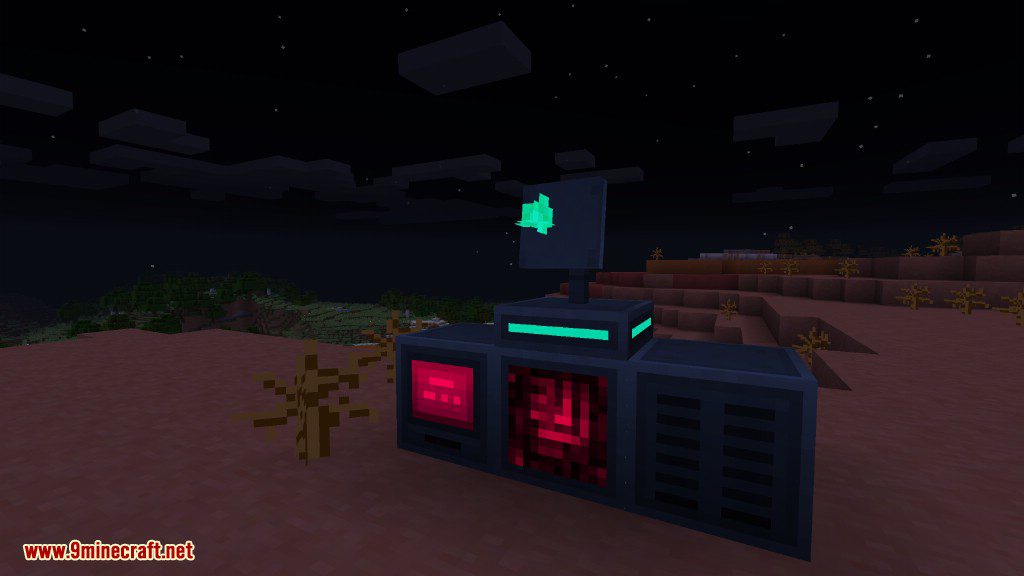
The Wireless Receiver links a network with another, one-way. The network with the receiver will be able to see and modify items in the linked network, but not vice-versa. Before placing a Receiver, you need to link it with a Transmitter by right-clicking on it. Once placed, if the Receiver can find the Transmitter, it will point toward it and glow green. If it cannot find the Transmitter, it will start spinning and turn red.
Wireless Transmitter
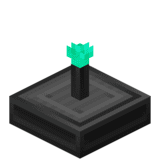
The Wireless Transmitter opens up a network’s contents to wireless access, via a Wireless Receiver or Wireless Terminal.
A Wireless Transmitter can be placed anywhere connected to a network, which will allow you to link Receivers and Terminals to it by right-clicking. The lights on the baseplate will glow green if you did it correctly.
Transmitters have a maximum range of 64 blocks. If you need more, you can build wireless extenders, consisting of a controller, a wireless receiver, and another transmitter.
Items
Drive
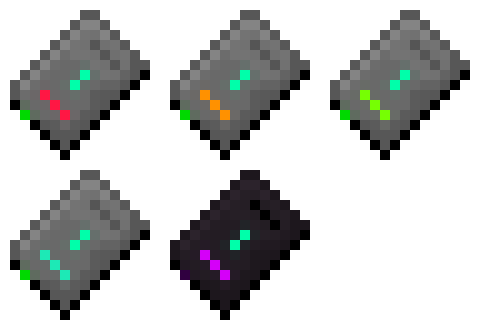
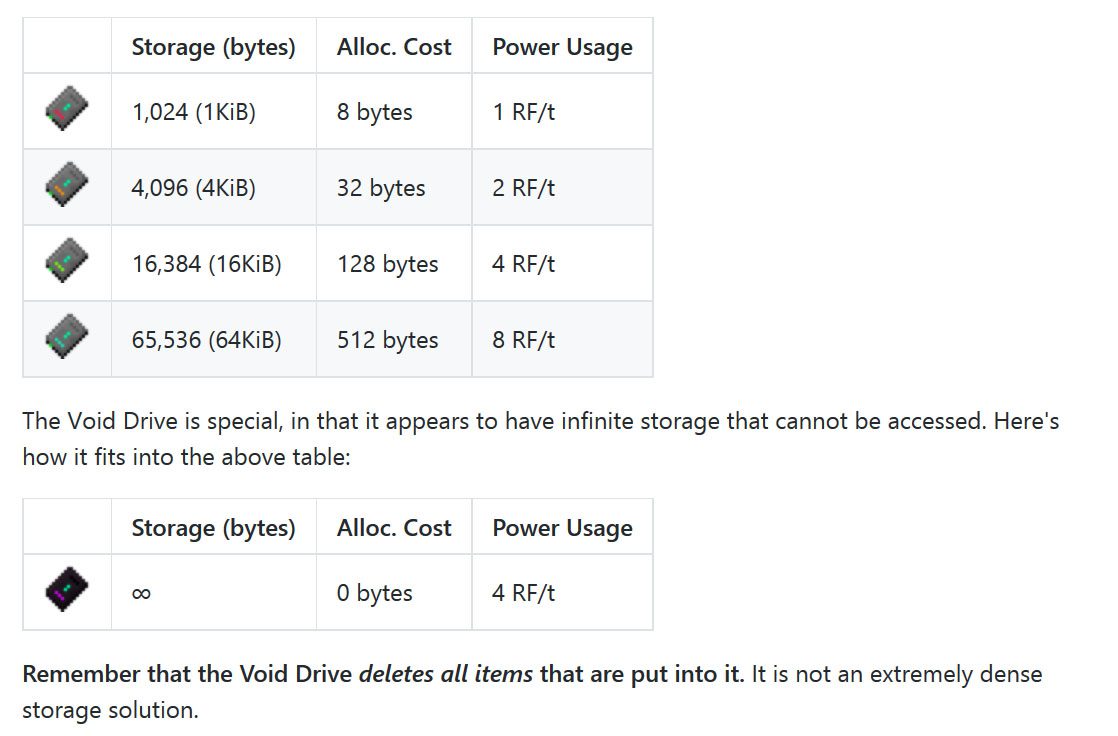
Drives are what actually store the items in a network. They come in a number of varieties, named after how much storage they have. In addition, there is one kind of special drive, the Void Drive, which simply deletes all items that would be stored in it.
A drive has many lights on it, which indicate its state. Rather than try to explain their location, here’s an annotated version of a 1KiB drive:
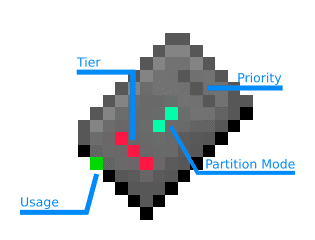
- Tier: The tier of this drive, such as red for 1KiB or orange for 4KiB.
- Usage: Fades from green to red, based on the current amount of bits and types used on the drive.
- Partition Mode: Teal for unpartitioned, white for whitelist mode.
- Priority: All gray for default, varying amounts of green or red lights for low or high priority (respectively)
The Tier and Usage lights are visible while the drive is in the drive bay. The Tier light is barely visible on the top of the drive, and the Usage light is visible on the front.
Drive Editor
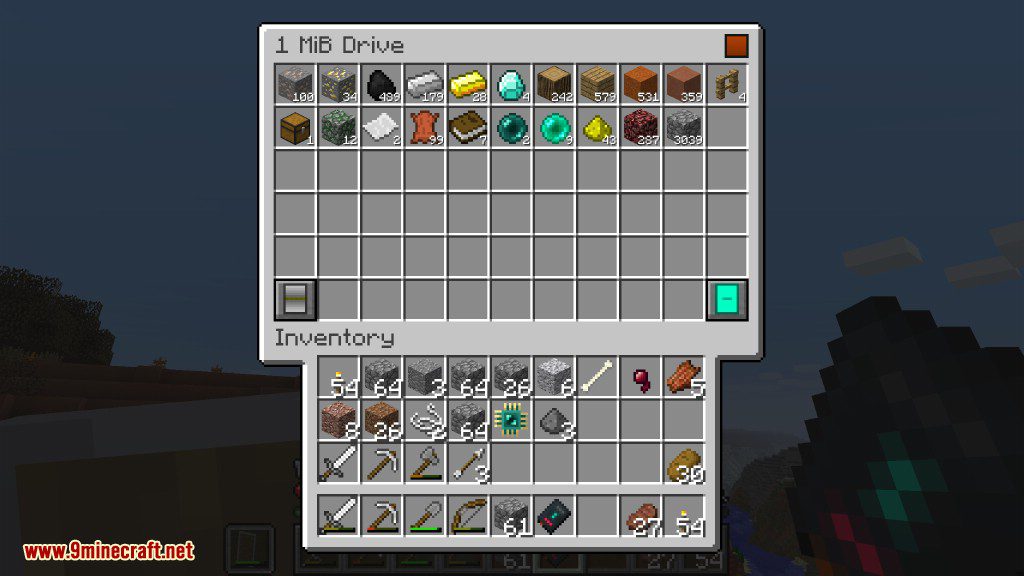
By right-clicking with a drive in hand, you will open the drive editor. This allows you to see the current items stored in the drive, as well as change the drive’s priority and partitioning mode. The bottom left button controls priority, while the bottom right controls the partitioning mode.
All the empty slots in the middle of the UI control the partition. You cannot remove partitioned types unless the drive does not currently have any of that item stored. If the drive is in Not Partitioned mode, items there are none of will be automatically deallocated.
Enderic Processor
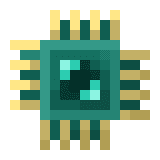
An Enderic Processor is a mysterious processor left behind by the same unknown forerunners as the strongholds, dungeons, and nether fortresses. As such, it can only be found in the chests in those structures. You can create more once you have at least one with 2 Nether Quartz, 2 Gold Ingots, 1 Ender Pearl, and 1 Diamond.
Wireless Terminal

The Wireless Terminal is a wireless variant of the Terminal. It acts much in the same way, but must be linked to a transmitter in the same way as a Receiver.
Weldthrower
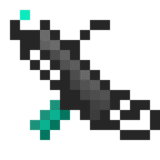
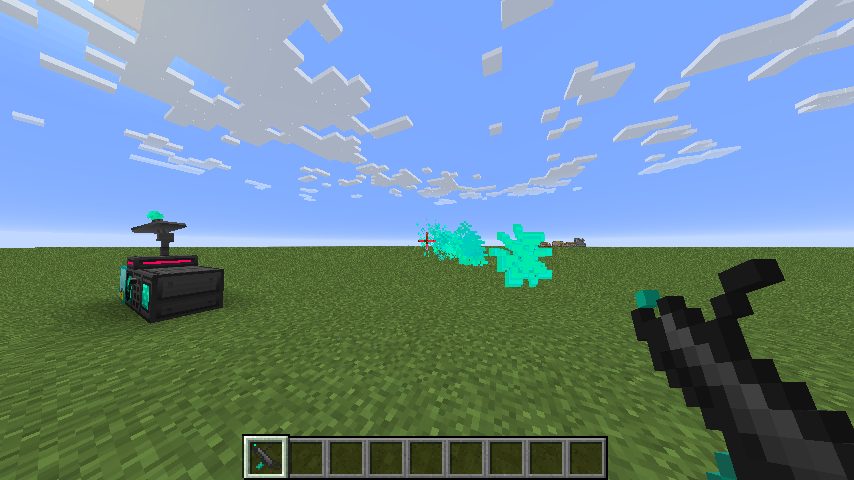
The Weldthrower is part wrench, part welder, and part flamethrower. It has two uses, the first is to disassemble network parts instantly, which can be done by shift-rightclicking a network part while holding it.
The second is to shoot sparks, which set fire to and damage anything in front of you. To do this, you must have Weldthrower Fuel in your inventory. When right-clicking, the weldthrower will consume one fuel and fire a blast of sparks forward.
Mechanics
Storage Math
Storage in this mod is determined by Types and Bits. For convenience, bits are usually displayed in the UI as bytes, which are 8 bits each. (i.e. 1 byte == 8 bits)
Every item uses 1 bit, regardless of stack size. As such, 8 items use 8 bits, or 1 byte. 64 items use 64 bits, or 8 bytes. In addition, there is a drive-specific allocation cost for each type. Every type of drive has only 64 types, and as such it’s best to make lots of small drives instead of a few large drives. Only make large drives if you have large amounts of a certain type of item to store.
Screenshots:
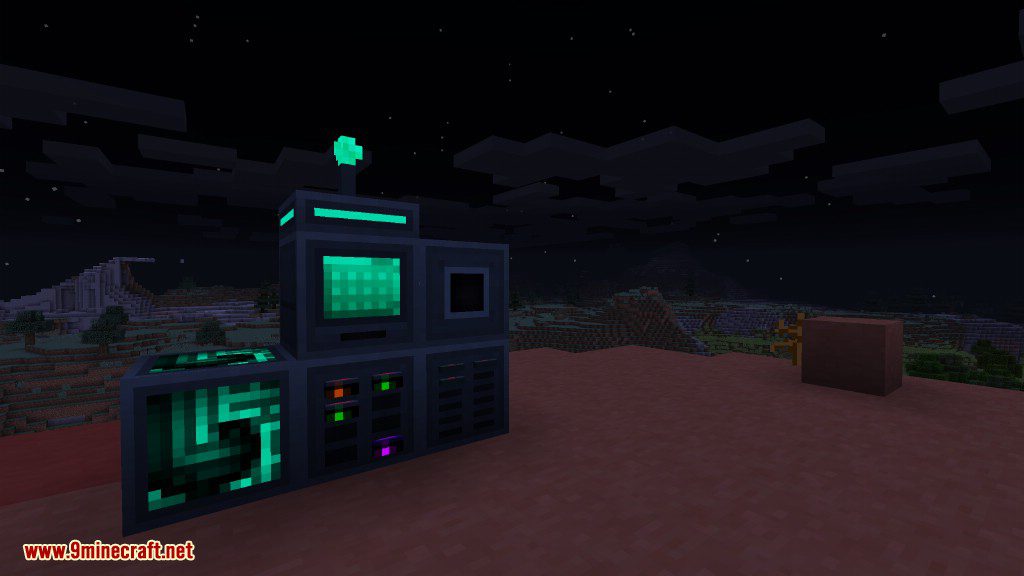
A basic system
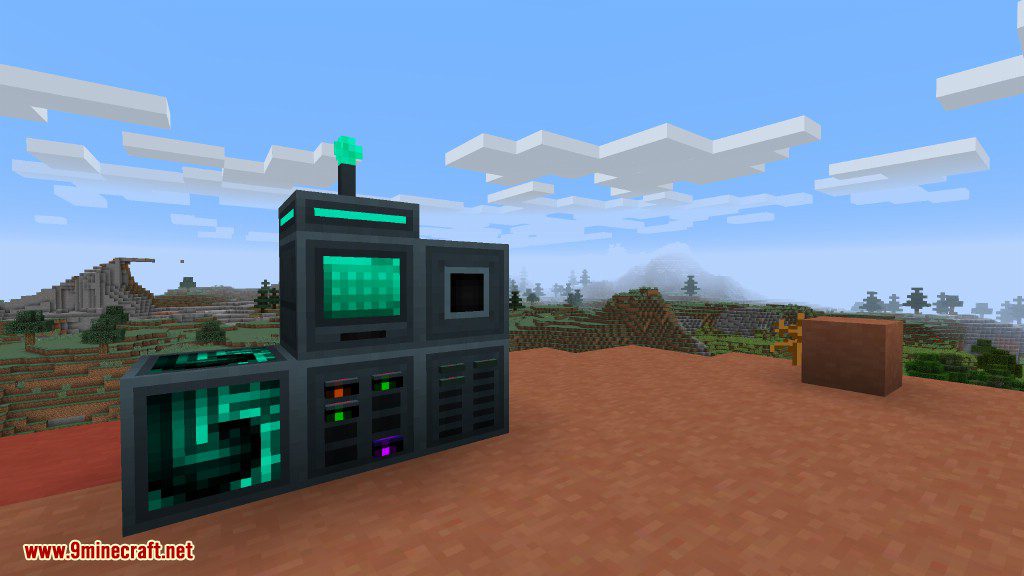
A basic system at night
The Interface
The Terminal
The Drive Editor
Crafting furnaces in the Terminal
A wireless system booting up
An erroring wireless system at night
Searching in the Terminal
Requires:
How to install:
Click the following link to view details: How to Install Mods for Minecraft Java Edition on PC: A Beginner Guide
Correlated Potentialistics Mod 1.10.2 Download Links
For Minecraft 1.8.9
For Minecraft 1.9.4
For Minecraft 1.10.2
You May Also Like
Browse Mod by Features
- Library & API
- Adventure & RPG
- Animal & Pet
- Anime & Manga
- Armor & Weapon
- Automation and Processing
- Backpack
- Boat & Ship
- Boss
- Bow & Arrow
- Bug Fixes
- Building & Structure
- Cape & Elytra
- Car & Vehicle
- Christmas
- Cut Down Trees
- Decoration & Furniture
- Dimension & Biome
- Dinosaur & Prehistoric
- Dragon
- Dungeon & Cave
- Fly
- Food and Farming
- Gun
- Hypixel
- Information & Guide
- Magic & Enchantment
- Minimap
- Mob & Creature
- Monster and Horror
- Morph
- Multimedia
- Ore and Resource
- Performance and Optimization
- Pokemon
- PvP & Combat
- Quality of Life & Cosmetic
- Redstone
- Server Utility
- Social
- Storage and Inventory
- Sword & Blade
- Technology and Science
- The End & Nether
- Tool & Utility
- XRay

