MCC Tool Chest – Free Minecraft NBT Editor+ for The Console
 6,517
6,517
 0
0
 September 4, 2024
 A Cynodont
MCC Tool Chest is the program will allow you to convert (transfer) a Java world to Bedrock Edition. MCC Tool Chest is an incredible resource for world conversion. Personally, I have both a Bedrock and a Java edition of Minecraft, and I have used this app to convert a world from one version to the other. Using to learn it is a bit technical (as with Note Block Studios), but once you have familiarized yourself with the options, it is a very powerful tool. Back up your world prior to using MCC Tool Chest.
MCC Tool Chest is a very, very powerful world editor and converter. Used properly, it can allow easy customization and editing of worlds. Once again, however, I want to warn you against trying to convert worlds you actually care about without backing them up first. Something could go wrong, and you could lose hours of adventuring and progress. But if you have a safe backup, feel free to experiment and have fun using this Minecraft companion app.
How to use:
Basic Operations
Open World: On the main menu under file click on open.
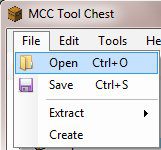
MCC Tool Chest will load the list of NBT file, click the file entry to edit NBT data.
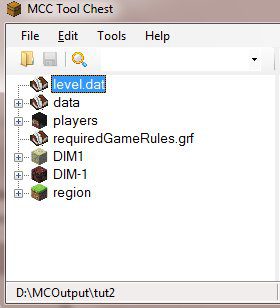
Edit World: Click on the desired file entry in the left panel. MCC Tool Chest currently allows you to modify the NBT Files and the Entities and TileEntities associated to a chunk.

Double click entry to edit.

Save World: After you are completed with your edits you can save the changes. The save process will also generate a new savegame.dat or GameData file depending on World console type.
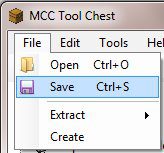
On the main menu under file click on Save. After all the modified files are saved the world file will be created relative to the working world type – savegame.dat XBOX
*GAMEDATA PS
* not currently able to resign PS gamedata after changes. Working on solution to provide full functionality on all consoles
![]()
The new world file is located in the working folder as displayed on the left portion of the status bar.
Player Operations
- Goto Chunk
- Delete
- Delete All
Chunk Operations
- Pin
- Delete
Additional Operations
Chunk Block Editor
A simple chunk block editor that allows you to edit the blocks visually by Y layer.
Provides the capability to copy/paste multiple Y layers.
Allows Layers to be copy/pasted to the same chunk or different chunks.
You can copy and paste between different instances of MCCTool Chest.
Provides the capability to Highlight a specific block type.
Manages the Block/Tile Entities associated with the edited blocks .
Allows the Tile Entity NBT data to be edited from the block editor.
Block list allows you to search for blocks by block id or by the blocks name or partial name.
Mouse Commands
Clicking on a block with associated tile entity will open the NBT Edit dialog for that tile entity.Block Editor Key Commands
Shift Key – Holding down the Shift key while clicking on a block will change block to block assigned to mouse button.
Ctrl Key – Holding down the control key while clicking on the block edit area will fill entire area with block assigned to mouse button.
Alt Key – Holding down the alternate key while clicking on the block edit area will fill all blocks of the block type under mouse with block assigned to mouse button.
Y Layer Key Commands
Ctrl-C – Copies all selected layers to clipboard. Layers do not need to be sequential.
Ctrl-V – Pastes layers held in clipboard to selected layers in Y Layer window. Selected layers to not need to be sequential.
Open world and click on the chunk that you wish to work with.
From the NBT panel right click on the blocks node and then click on the Block Editor menu item.
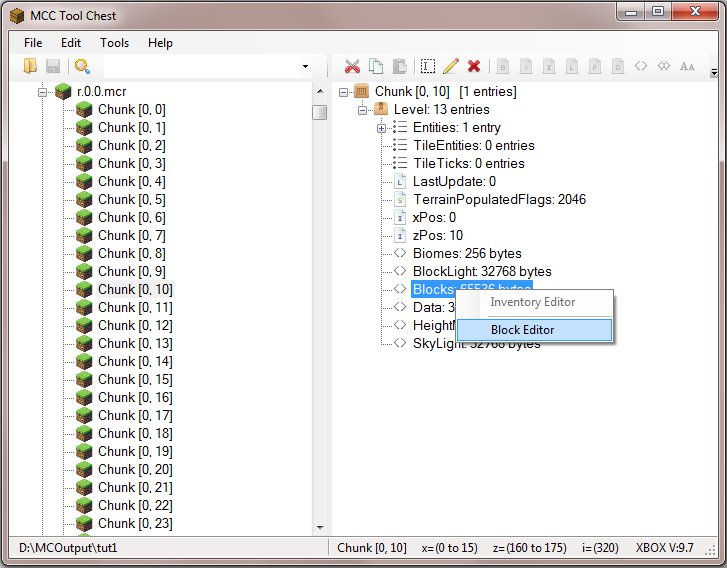
This will open the Block Editor dialog that allows you to make simple changes to the blocks contained within the chunk.

Block List
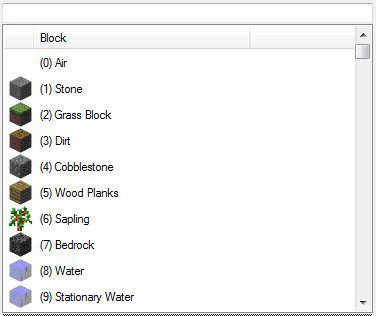
Left clicking on block in block list will assign block to the Left mouse button.
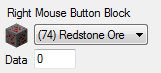
Right clicking on block in block list will assign block to the Right mouse button
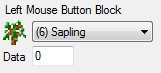
You will need to manually set the data value for the block that is to be placed.
You can manually assign a block to the mouse buttons by using the block dropdown associated with mouse button.
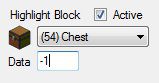
Highlight Block will outline in red all blocks that match the block id and data value.
When data value equals -1 the match will disregard the data value and just match on block id.
Y Layer Copy and Paste
Ctrl-C – Copy layers 60, 61, 63, 64 and 66
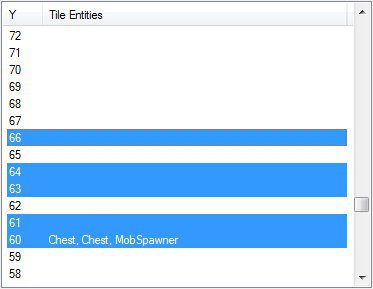
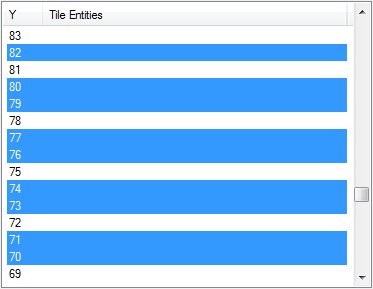
Ctrl-V – Paste layers
60 to 70
61 to 71
63 to 73
64 to 74
66 to 76
60 to 77
61 to 79
63 to 80
64 to 82
Biome Editor
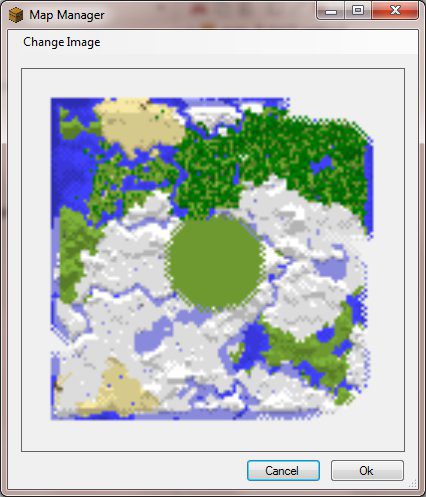
Map Manager
Map Manager provides the capability to replace player maps with any compatible image.
Formats supported: PNG, JPG, GIF
Auto resizes image to 128×128 format required by Minecraft.
Right click on the data node of the player map that you wish to change.
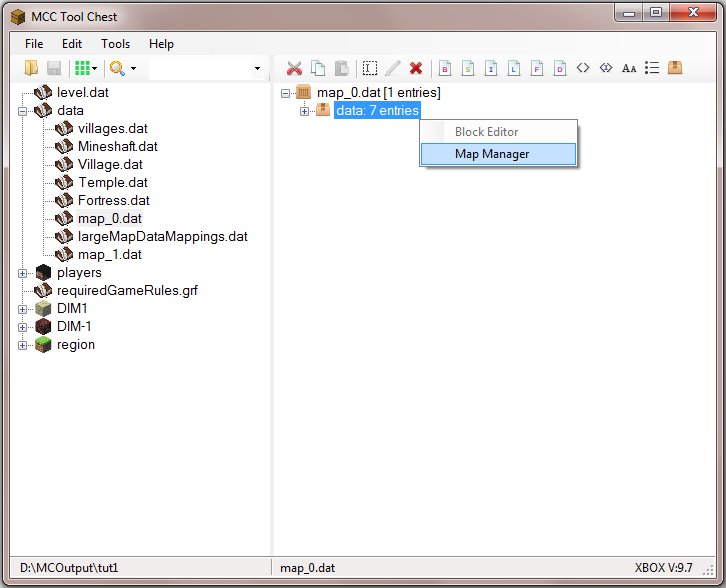
Click Change Image to add new image to the player map.
Tools
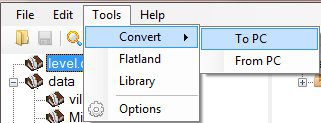
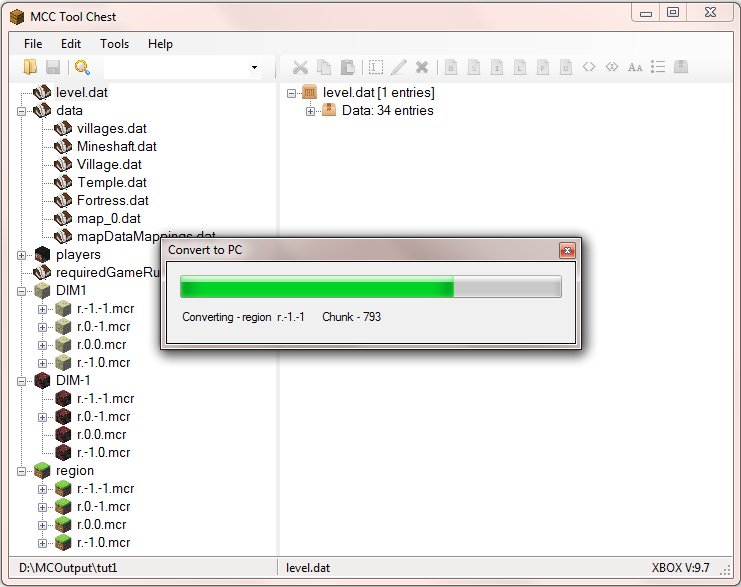
Convert To PC
Convert XBOX and PS3 worlds to Mincraft PC.
MCC Tool Chest will convert XBOX360 and PS3 worlds to the Minecraft PC format.
Extract/Open world in MCC Tool Chest. On the main menu under tools click on Convert and then click on To PC.
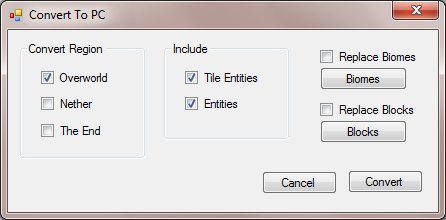
This will bring up the Convert To PC options dialog.
From the Convert To PC options dialog you can choose which region to convert to the MC PC platform.
You also have the option to replace Biomes and/or Blocks during the conversion process.
You can include/exclude Tile Entities and Entities during the conversion process.
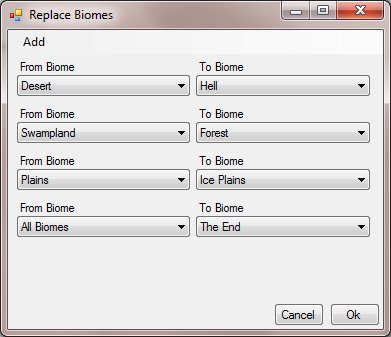
The Replace Biomes dialog allows you to configure the biomes that you would like replaced and their associated replacement biome.
- The replacement occurs during the conversion process.
- Click the Add menu item to add additional biome entries.
- Selecting All Biomes for the From Biome value allows you to replace all biomes regardless of type.
- You can have as many biome entries as need requires.
- Right clicking on a biome entry brings up a Delete menu that allows you to delete the biome entry.
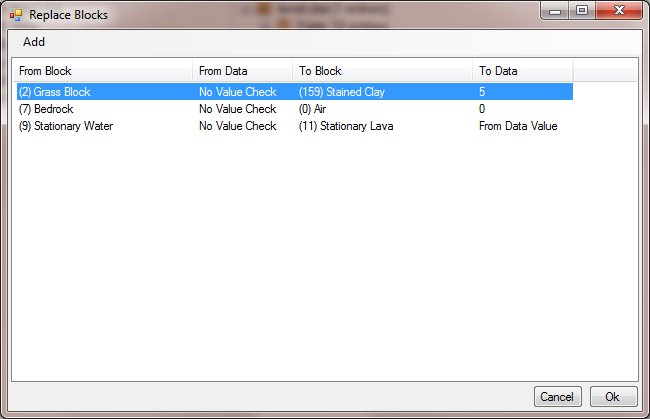
The Replace Blocks dialog allows you to configure the blocks that you would like replaced and their associated replacement block.
- The replacement occurs during the conversion process.
- Click the Add menu item to add additional block entries.
- The process will replace the block when the From Block Id and Data values match the current block being processed.
- The process will not attempt a match on the From Block Data value when equal to -1.
- The process uses the To Block Id and Data values for the replacement values.
- The replace will use the From Block Data value when the To Block Data value equals -1.
- You can have as many block entries as need requires.
- Right clicking on a block entry brings up a Delete menu that allows you to delete the block entry. or all entries.
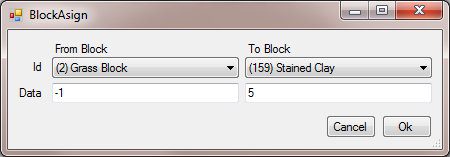
Block Assign Replacement dialog
Conversion will will be done for all regions that have been checked in the Convert To PC options dialog.
The conversion process creates a folder named PC under the the extraction folder. It writes the converted region files to their appropriate folders under the PC folder. The conversion process also creates a basic level.dat file for new worlds.
For new worlds you can copy the PC folder to your MC save folder. Rename copied folder as needed.
For existing MC PC worlds you can copy the region files to the MC PC world overwriting the the existing region files.
Convert From PC
Convert Mincraft PC worlds to XBOX and *PS .
MCC Tool Chest will convert Minecraft PC formatted worlds to the XBOX and PS format.
Extract/Open the XBOX or PS world in MCC Tool Chest.
On the main menu under tools click on Convert and then click on From PC.
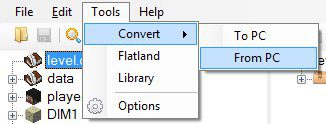
This will bring up the Convert From PC options dialog.
From the Convert From PC options dialog you can choose which region to convert from the MC PC platform.
You also have the option to replace Biomes and/or Blocks during the conversion process.
You can include/exclude Tile Entities during the conversion process.
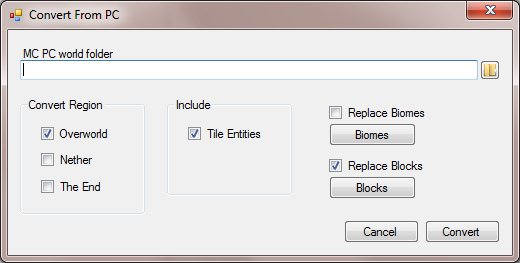
Enter the top level folder for the MC PC world that you wish to convert.
![]()
The Replace Biomes dialog allows you to configure the biomes that you would like replaced and their associated replacement biome.
- The replacement occurs during the conversion process.
- Click the Add menu item to add additional biome entries.
- Selecting All Biomes for the From Biome value allows you to replace all biomes regardless of type.
- You can have as many biome entries as need requires.
- Right clicking on a biome entry brings up a Delete menu that allows you to delete the biome entry.

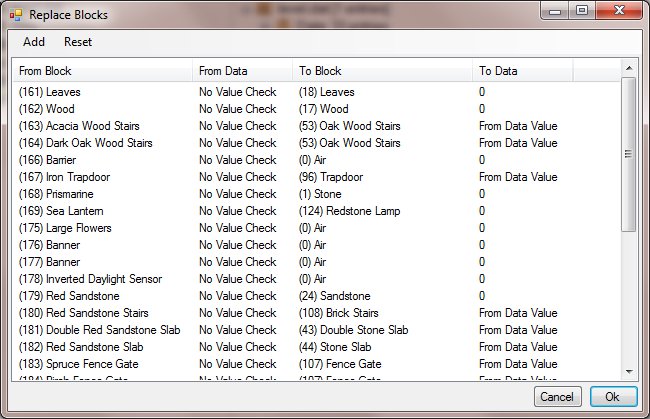
The Replace Blocks dialog allows you to configure the blocks that you would like replaced and their associated replacement block.
- The replacement occurs during the conversion process.
- Click the Add menu item to add additional block entries.
- The process will replace the block when the From Block Id and Data values match the current block being processed.
- The process will not attempt a match on the From Block Data value when equal to -1.
- The process uses the To Block Id and Data values for the replacement values.
- The replace will use the From Block Data value when the To Block Data value equals -1.
- You can have as many block entries as need requires.
- Right clicking on a block entry brings up a Delete menu that allows you to delete the block entry. or all entries.
- You use the Reset menu item to reset the replace blocks to default values.
Block Assign Replacement dialog

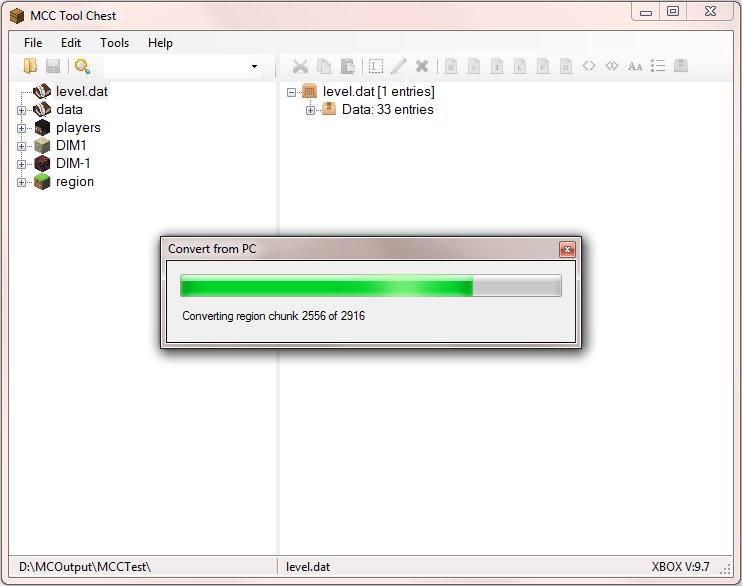
Conversion will will be done for all regions that have been checked in the Convert From PC options dialog.
Once the Convert From PC is complete a new savegame.dat or *GAMEDATA (Depending console) will be created under the current working folder.
Replace
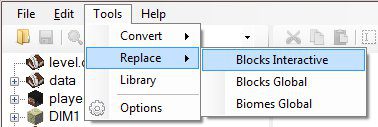
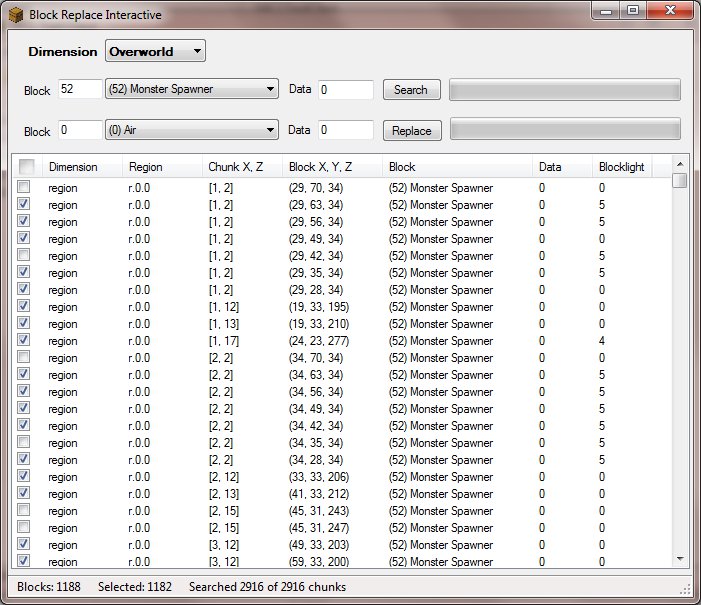
Replace Block Interactive
Replace Block Interactive dialog allows you to interactively search and select the blocks to be replaced.
On the main menu under Tools click on Replace and then click on Block Interactive.
Enter the search block and associated data value and press the Search button.
All region chunks in dimension will be searched for block and data value.
The search will only match on the block value when the data value equals -1.
Check the blocks that you wish to replace.
Enter replacement block and data value. Replace will use original data value when the replace data value equals -1.
Press the Replace button after the blocks to be replaced are checked and the replacement block is set.
Add GRF
On the main menu click “Tools” and then “Add GRF”.
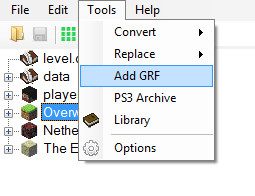
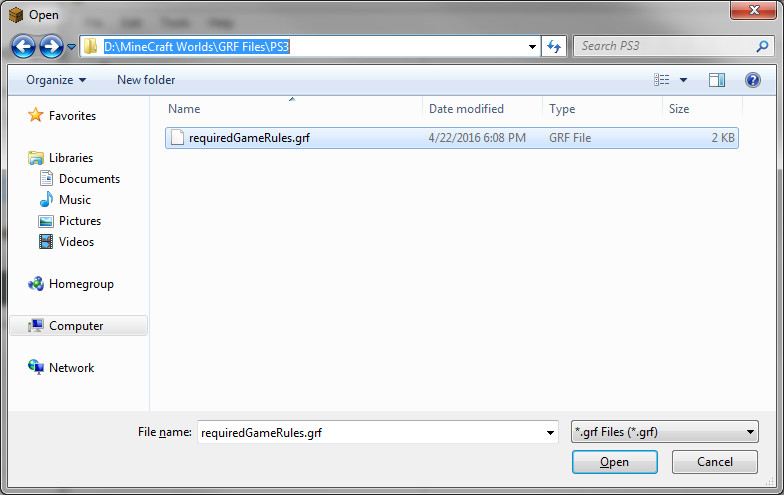
This will open a file dialog window that allows you to select the GRF file that you want to add to the world.
Select the GRF file that you wish to add and then click the Open button.
Do not add a GRF file from a different console type.
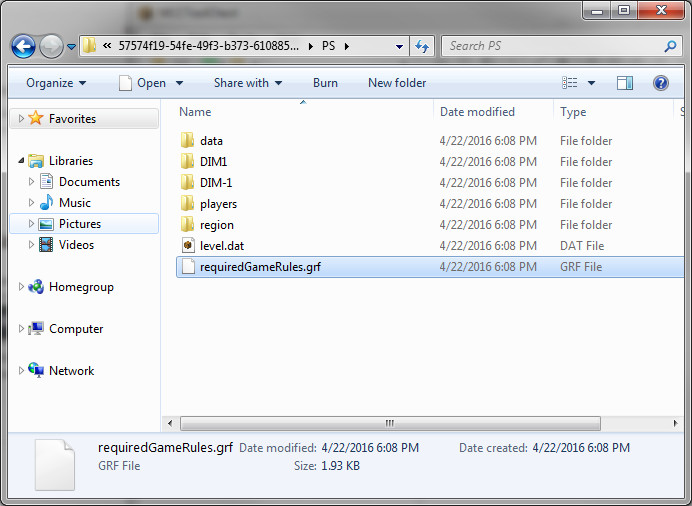
Extracting existing GRF
Open the world that has a GRF file that you want to copy.
You can get a working GRF file from the current tutorial world.
Click on Working Folder icon at bottom of screen.
This will open the working folder in file explorer.
The working folder provides access to the files that make up the world.
Double click on the console folder. PS or XBOX
Select the the GRF file, copy and paste to a folder of your choosing.
MCC Tool Chest Library
The Library allows for the easy storage and retrieval of NBT code blocks.
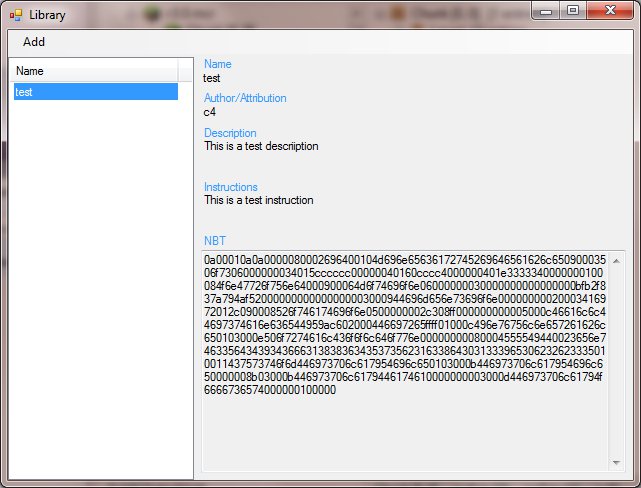
Copy from library
Select on a library item in the left panel and then double click in the NBT area.
Press CTRL-C to copy to clipboard. (Future release will add a copy button to simplify process)
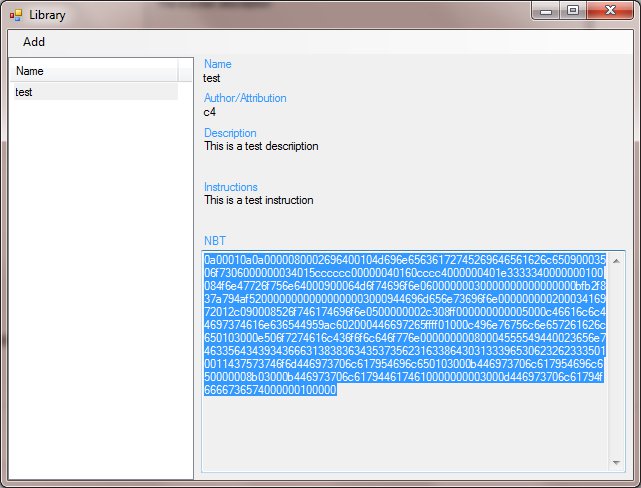
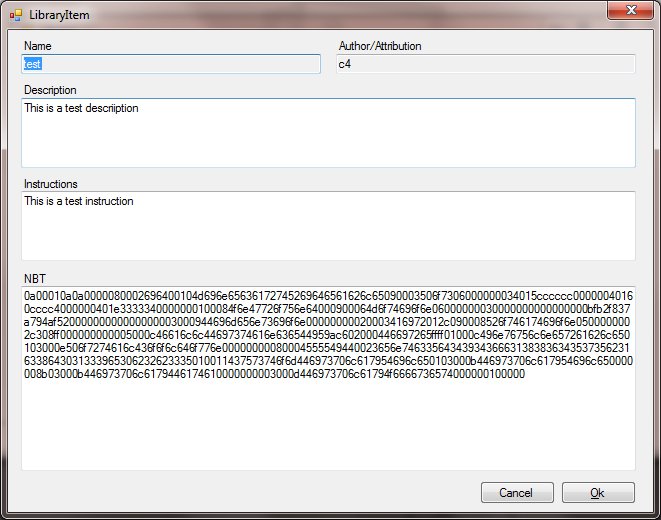
Add Library Item
Click the Add menu item to add a new library item,
This will bring up library item dialog where you enter the data for the library item.
Required fields are Name and NBT. The NBT value is a binary data string.
You will need to copy the NBT data from the main windows NBT pane prior to opening the add dialog.

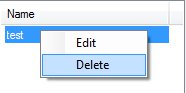
Edit Library Item
You can edit an existing library item by right clicking on it and pressing the Edit menu item.
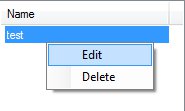
This will bring up library item dialog where you can make changes to the library item.
Name and Author fields are locked for existing items.
Delete Library Item
You can delete an existing library item by right clicking on it and pressing the Delete menu item.
GRF Editor
Chunk Status Display
![]()
D:\MCOutput\tut1 – The current working folder.
Location the world data was extracted to.
Chunk [4, 12] – The active chunks X and Z coordinates.
x=(64 to 79) – X span for the blocks contained in the active chunk.
z=(192 to 207) – Z span for the blocks contained in the active chunk.
i=(388) – The active chunks index in the region file.
XBOX – Identifies the worlds console type.
Displays PS when world is from PS console.
Displays XBOX when world is from XBOX console.
World version found in savegame.dat or GAMEDATA file.
Requires:
VS 2012 C++ Runtime: Required by MCC Tool Chest when working with XBOX worlds. If you are unable to open a chunk or to convert a world, then you need to install the runtime.
Minecraft PS3 Game Resigner: Used to resign the data files after modifying world with MCC Tool Chest. Can also be used to correct PS3 region for downloaded worlds. Copy the GAMEDATA file to a world created on your console and then resign.
MCC Tool Chest Download Links
Windows Installer (Exe file): Download from Server 1 – Download from Server 2
You May Also Like