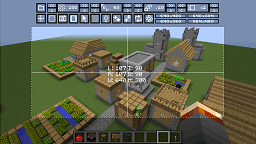
PreciousShot is a mod related to screenshot. It adds many useful functions about screenshots:

  • Set flexible screenshot size
  • Continuous shooting
  • Panorama shooting
  • Apply brightness and FOV when shooting
  • Glid support
  • View screenshots in game
  • Tweet screenshots from game

Enjoy more comfortable photo life with PreciousShot.

How to use:

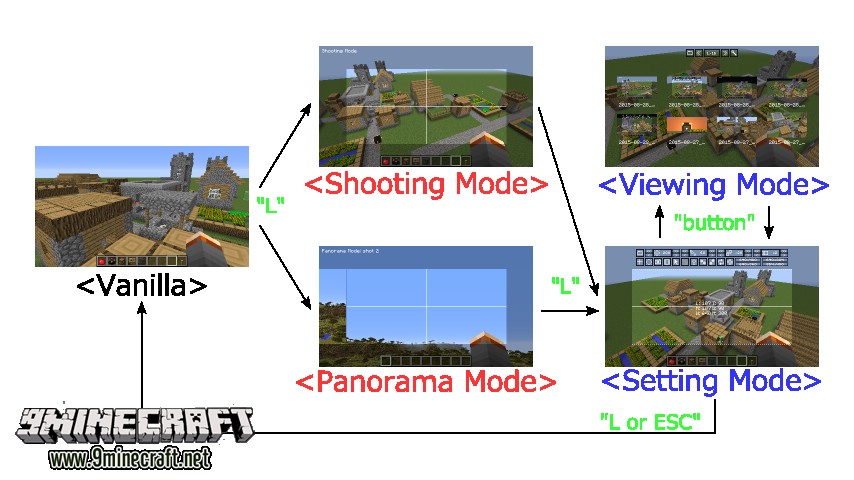
PreciousShot has 4 modes:

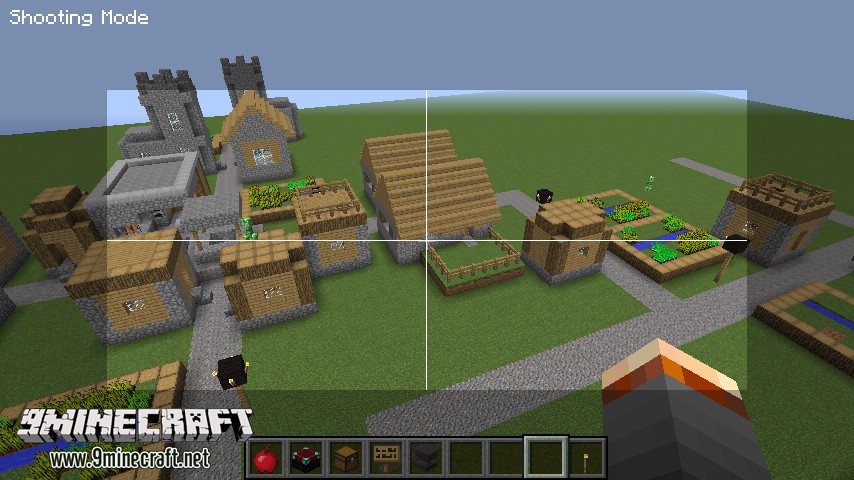
  • Shooting Mode: In this mode, you can take a screenshot with variable settings applied. It is a main mode of this mod.
    You can show the mode by pressing L key.
  • Panorama Mode: In this mode, you can take a panorama shot.
    You can show the mode by pressing L key, only if the panorama function is set on in the setting mode.
  • Setting Mode: In this mode, you can control variable settings of this mod, such as image size, brightness, FOV, continuous shooting speed, etc.
    You can show the mode by pressing L key when the shooting mode or panorama mode is open.
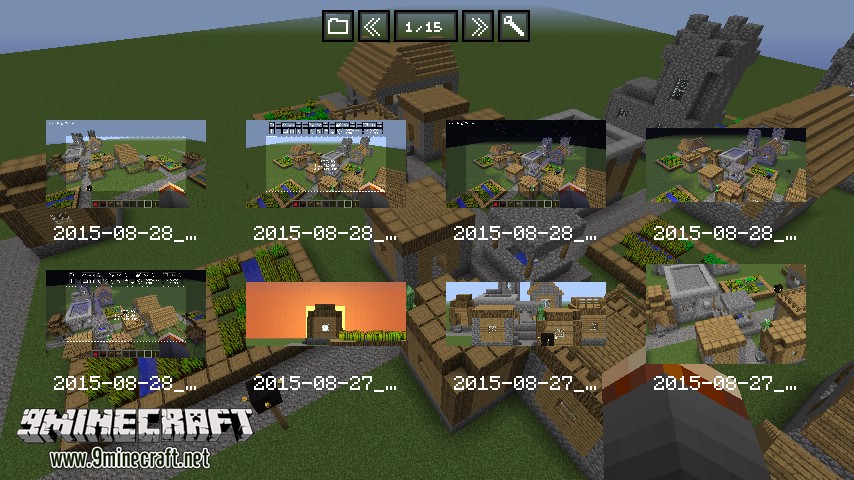
  • Viewing Mode: In this mode, you can view your screenshots in your game.
    You can show the mode by pressing a button in the gui of the setting mode.
PreciousShot-Mod.jpg

Shooting Mode

Show Spoiler

In this mode, you can take a shot with variable settings applied. All of settings could be set in the setting mode.

You can show this mode by pressing L key from the default display.

[The functions blow are enabled in default.]

You can take a screenshot by pressing F2 key (same key as vanilla’s).
You can set arbitrary shooting sizes, not entire display width and height. As you can see above, the part outside the shooting area is colored black.
Configured brightness and FOV will be applied in this mode.
Continuous shooting will be done by pressing F2 key continuously.

You can display glids for supporting your shot. There are 5 types of glid in total.
Even if you don’t press F1 key, the rendering such as the player’s hand, inventory etc will be disappered whe shooting.

[The functions blow are disabled in default.]

You can take a shot by right-clicking.
You can adjust FOV (zoom) by mouse-wheeling.

PreciousShot-Mod-1.jpg

Panorama Mode

Show Spoiler

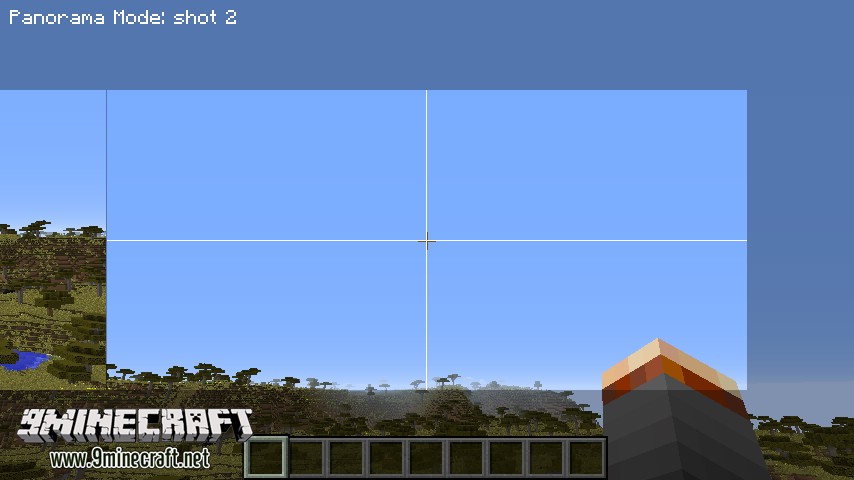
In this mode, you can take a panorama shot. All of settings could be set in the setting mode.

You can show this mode by pressing L key from the default display, only if the panorama function is set on in the setting mode.

After you take a one shot, the right part of the shot will be shown at the left part of the display. You can take the next shot easily by matching the right part to the current shooting area.
After the configured times of shooting, all of the previous shot will be connected and saved as one photo.
All other settings can be applied like the shooting mode.

PreciousShot-Mod-2.jpg

Setting Mode

Show Spoiler

PreciousShot-Mod-3.jpg

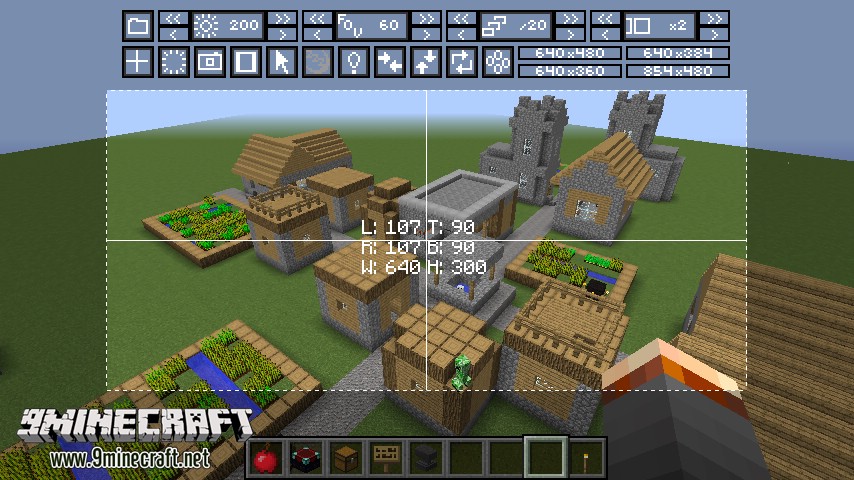
In this mode, you can control variable settings of this mod, such as image size, brightness, FOV, continuous shooting speed, etc.

You can show the mode by pressing L key when the shooting mode or panorama mode is open.

PreciousShot-Mod-4.png

①[Viewing Mode]: change into the viewing mode.
②[Brightness]: set brightness, wich will be applied to the shooting and panorama mode.
You can increase or decrease it by the arrow buttons placed in both sides.
The value is from 0% to 200%.
On or off is changed by the center button.
③[FOV]: set FOV, which will be applied to the shooting and panorama mode.
You can increase or decrease it by the arrow buttons placed in both sides.
The value is from 10° to 170°.
On or off is changed by the center button.
④[Continuous Shooting]: set the speed of continuous shooting, which will be applied to the shooting and panorama mode.
You can increase or decrease it by the arrow buttons placed in both sides.
Continuous shooting will be done per ticks of the set value. For example, if the set value is 10, you can shoot in each 10 ticks.
The value is from 1 tick to 20 tick.
On or off is changed by the center button.
⑤[Panorama]: switch the panorama function, and set how many times you take a shot in the panorama mode.
You can increase or decrease it by the arrow buttons placed in both sides.
A panorama image will be generated after you shoot times of the set value.
The value is from 1 time to 20 times.
On or off is changed by the center button.

⑥[Glid]: switch the display of glids for supporting your shots. There are 5 types of glids and no glids.
⑦[Auto Hide]: switch the auto hide function, in which the rendering such as the player’s hand, inventory, etc will be disappered when shooting.
⑧[Default Shot]: switch the mod’s screenshoting into vanilla one, and vice versa.
⑨[All Time Rendering]switch the all Time rendering funtion, in which the mod rendering will be shown even if F1 key is pressed.
⑩[Mouse]: switch the mouse function, in which you can take a shot by right-clicking, and also adjust FOV by mouse-wheeling.
⑪[Night Display]: switch the night display function, in which the black colored margin of the shooting and panorama mode can be colored white.
⑫[Chat Display]: switch the chat display function, in which the mod can notice the finish of shooting through the chat lines.

dotted lines on the display[Sizing]: You can set the size of your shots by graspping and dragging the dotted lines on the display.
The current value is show on the center.
L, T, R, B means left, top, right, bottom margins. And w, h means width and height.
All numbers are pixels.
⑬[Horizontal Centering]: This button horizontally center the shooting size.
⑭[Vertical Centering]: This button vertically center the shooting size.
⑮[WH Inversion]: This button inverse the width and height.
⑯[0 Margins]: This button set all margins 0.
⑰[Size Set]: This button set the shooting size into the shown values. For example, “640×480” button will set width into 640, and height into 480.
There are 4 sets in total, and you can configure the value of each set from the config file.

Viewing Mode

Show Spoiler

PreciousShot-Mod-5.jpg

In this mode, you can view your screenshots in your game.

You can show the mode by pressing the button in the gui of the setting mode.

All of images contained in the screenshots folder will be shown in list.
The left “folder” button will open the screenshots folder.
The middle “arrow” button will change the display pages.
The right “wrench” button will open the setting mode.

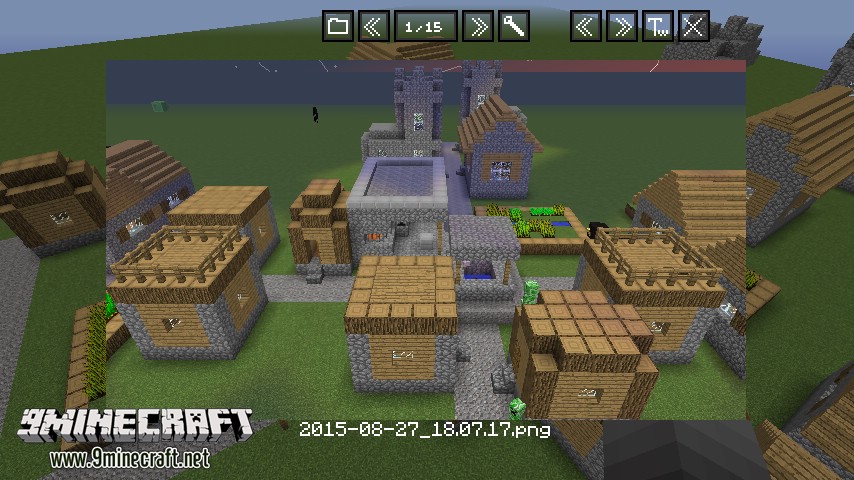
Click the image in the lists, then the mode will change into “each” display mode.

PreciousShot-Mod-6.jpg

Some additional buttons appear at the right upper part.
The left “arrows” button will change the shown image.
The “Tw” button will tweet the image with text.
The “x” button will change the mode into the list view.

Twitter Function

Show Spoiler

In this mod, you can tweet your screenshot with text! But, to use this function, you have to take some procedure.

Procedure 1

First of all, you have to add a new jar file into the mods folder.

1. Go to the Twitter4J and download “twitter4j-4.0.4.zip”.
2. Develop the downloaded zip file.
3. put the “/lib/twitter4j-core-4.0.4.jar” in the developed folder into your mods folder.

Procedure 2

Next, you have to register your twitter account as an application.
1. The mod needs the 4 long string, consumerKey, consumerSecret, accessToken, and accessTokenSecret.
2. Google like “twitter application register”, and get the above 4 strings.
3. Write the 4 string in the config file.

If you have successfully done the above procedure, you can tweet your screenshot from the each display of the viewing mode.

PreciousShot-Mod-7.jpg

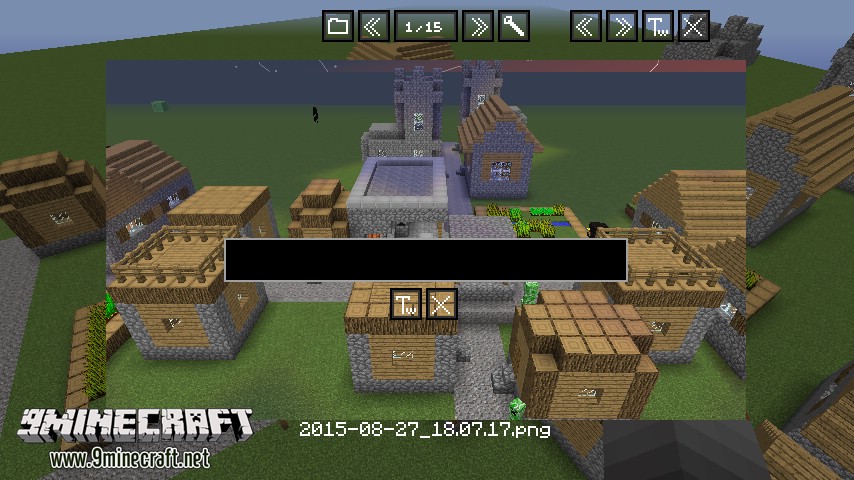
By pressing the “Tw” button in the each display of the viewing mode, a text box and a button will appear on the center.
Just write your text in the text box in need.
The “Tw” button below the box will tweet your text and image.
It takes a littel time to finish tweeting.
A noticing text will be added on your chat after finishing the tweet.
The “x” button below the box will stop tweeting.

Config:

Show Spoiler

You can configure the below settings from the config file.

The id for the key to open each mode. The default value is 38 (L key).
Size sets in the setting mode. Up to 4 sets.
consumerKey, consumerSecret, accessToken and accessTokenSecret for Twitter Function.

How to install:

  • Download and install Minecraft Forge.
  • Download the mod.
  • Go to .minecraft/mods folder.
  • If the “mods” folder does not exist you can create one.
  • Drag and drop the downloaded jar (zip) file into it.
  • Enjoy the mod.

Download Links

For Minecraft 1.8

https://dl4.9mcstorage.com/index.php?act=dl&id=1442635175

Click to rate this post!
[Total: 0 Average: 0]