SimpleClans Plugin (1.19, 1.18) – Spigot
SimpleClans Plugin (1.19, 1.18) is a versatile Clan system that can be used on a variety of servers, including PvP servers. With its customizable configuration, it can also be adapted to fit other types of servers, such as RPG and survival servers.
Features:
– GUI
– Discord integration
– Web stats
– Wars
– Land sharing (WorldGuard, PlotSquared, GriefPrevention)
– MySQL and SQLite
– PlaceholderAPI
– Economy support (Vault)
– KDR tracking
– Kill reward
– Chat for clans and alliances
– Bank account
– Bulletin board
– Upkeep and member fee
– Friendly fire settings
– Alliances and rivalries
– Vitals and coordinates
– Home and regroup
– Default ranks: leader, trusted and non-trusted
– Custom ranks and permissions per clan
– Verified and permanent status
– Smart TAB completions
– Leaderboard via commands or GUI
– Moderation commands
– Spy chat
– API with 25+ events
– Tamable mobs sharing
– Voting
Commands:
– /clan create – creates a clan
– /clan invite – invites someone to your clan
– /clan leaderboard – shows the best players
– /clan war – starts/ends wars
– /clan land – shares lands with your clan members
– /clan ally – adds/removes alliances
– /clan home – sets/teleports to your clan base
– /clan list – lists all clans
– /clan profile – shows information about a clan
– /clan lookup – shows information about a player
– /clan promote – promotes a member to leader
– /clan trust – trusts a member
– /ally <message> and /. <message> – to talk with clan members or allies
– /clan bank – manages the bank account
Permissions:
– simpleclans.anyone.* – (Auto added) Permissions for anyone
– simpleclans.member.* – (Auto added) Permissions for those who can be clan members
– simpleclans.leader.* – (Auto added) Permissions for those who can be clan leaders
– simpleclans.mod.* – (Auto added to OPs) Permissions for moderators
– simpleclans.admin.* – (Auto added to OPs) Permissions for admins
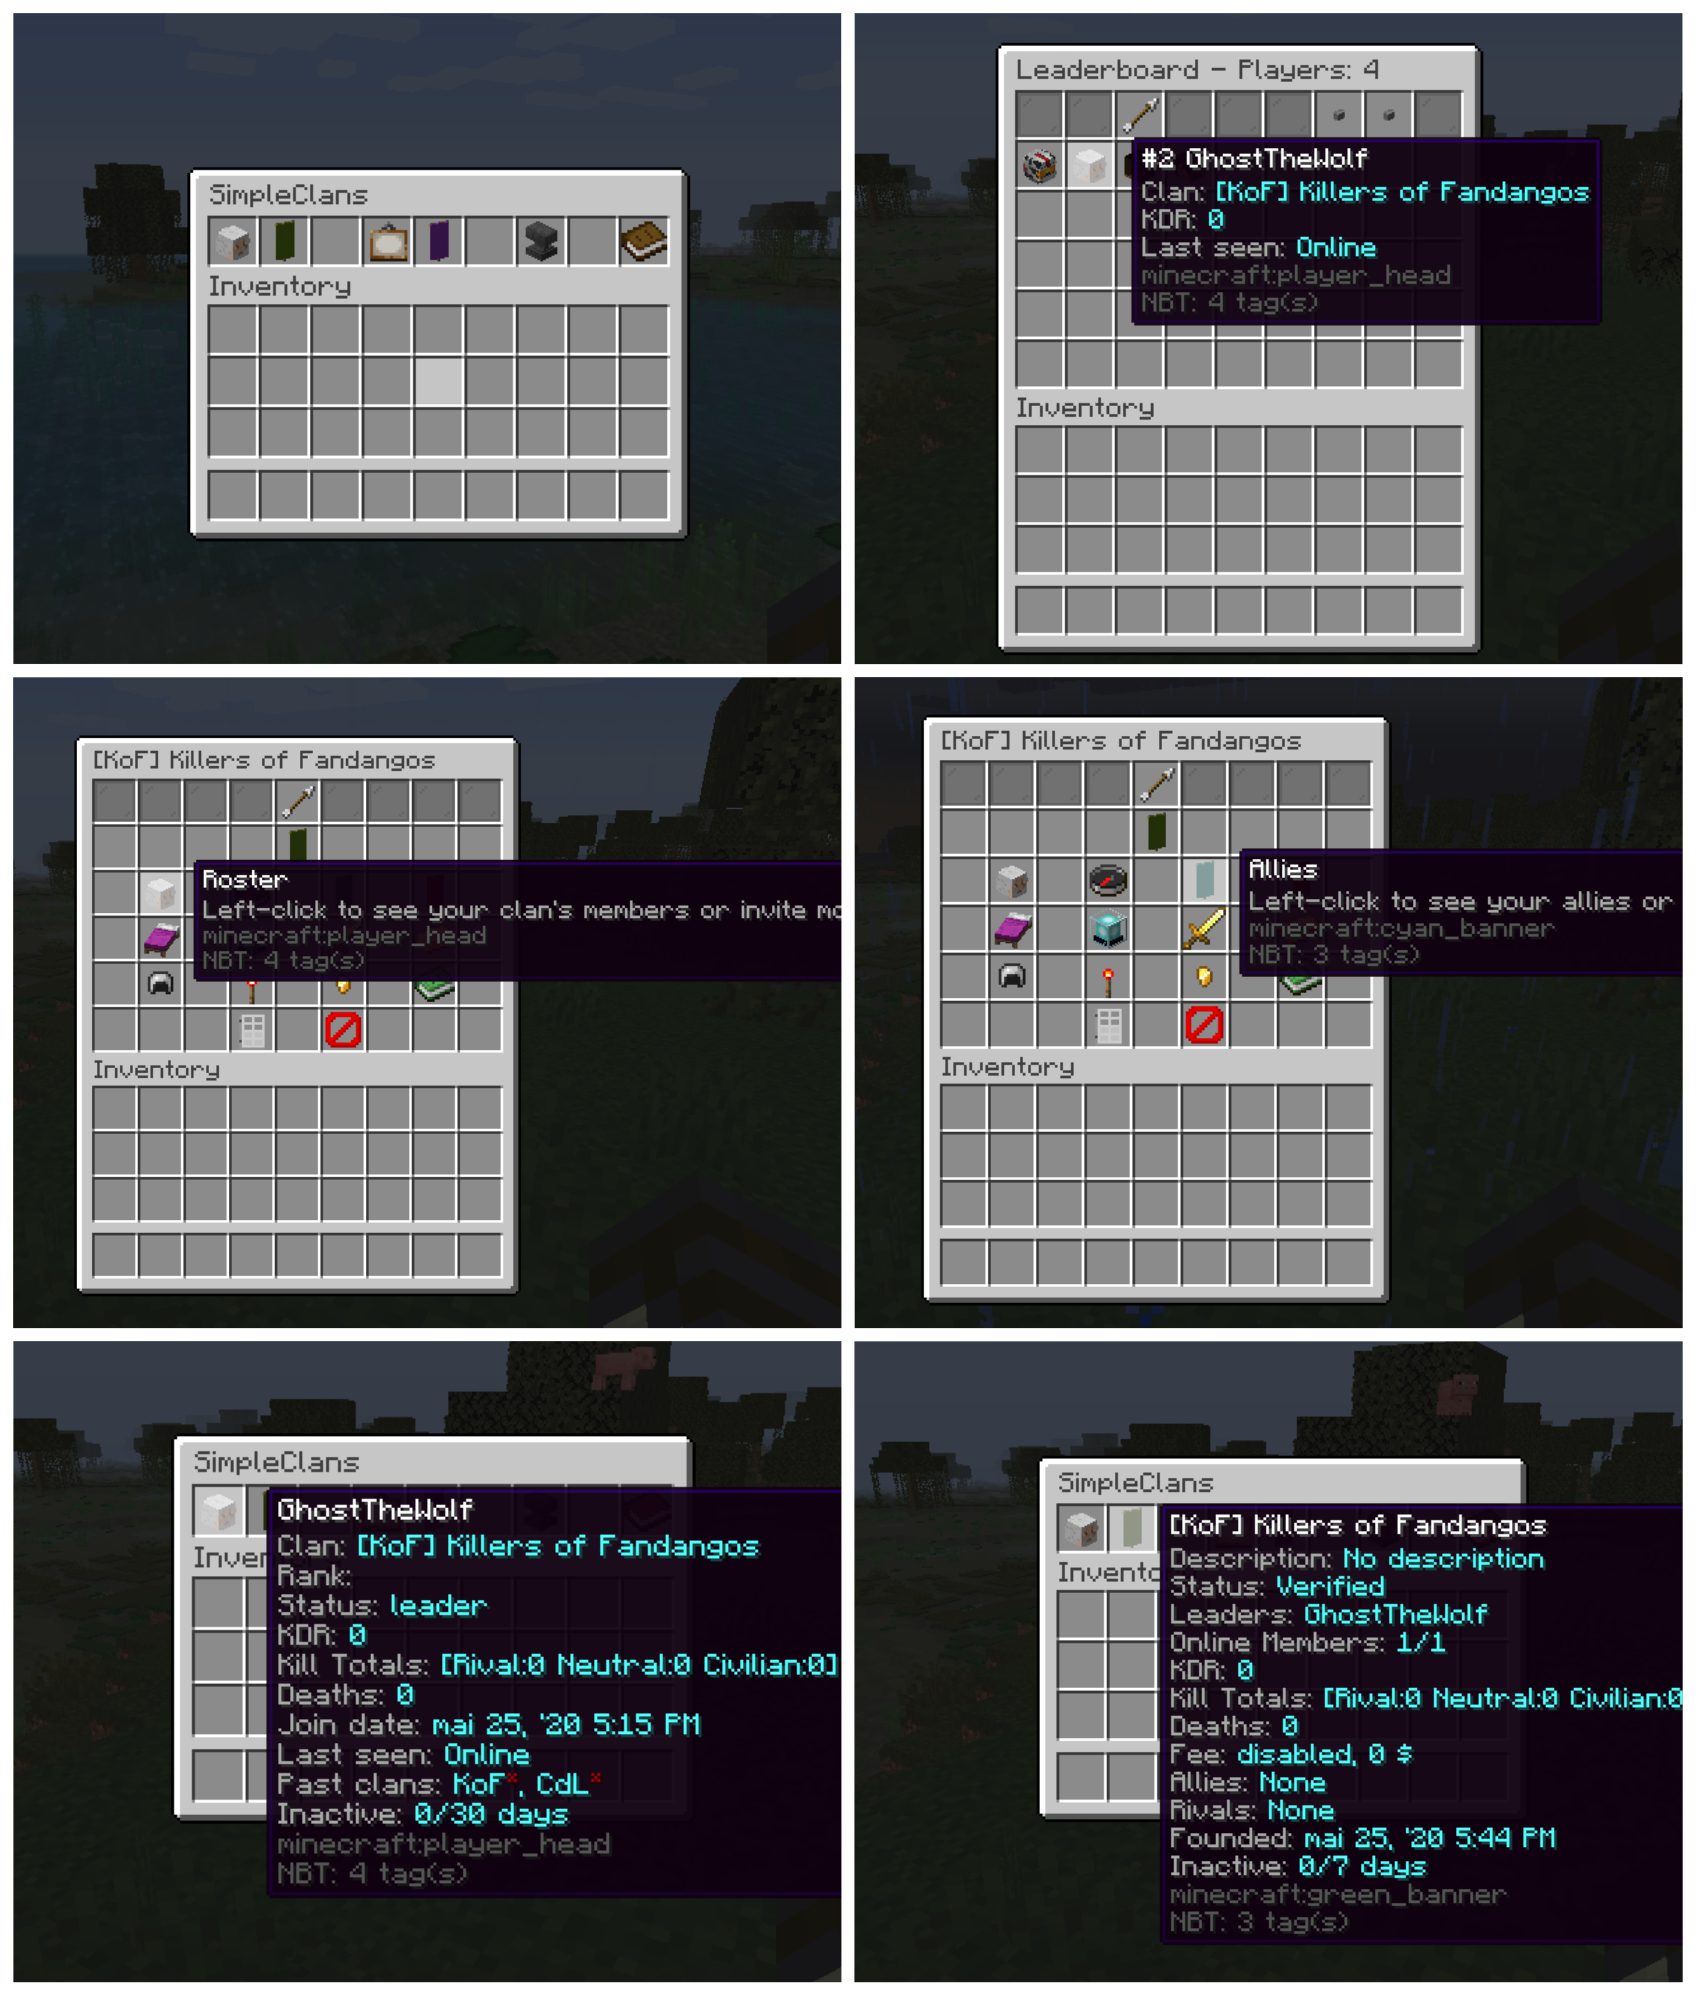
Screenshots:
How to install:
- Download a plugin of your choice.
- Place the .jar and any other files in your plugin’s directory.
- Run the server and wait for it to fully load.
- Type stop in your Minecraft server console to bring the server to a clean stop.
- Run the server.
- All done! Your plugin should be installed and ready to be used.


 0
0  January 20, 2023
